Categories
Online Marketing

How to FILM & EDIT a Commercial!

What’s up guys, Nick here back with another article today we’re going to break down the process of how to film and edit a commercial similar to the 45 second version that I made for super 73. So every single piece of content that you see come through on the internet, whether it’s on YouTube or Instagram, whether it’s photo or article all of those kinds of pieces of content, require three things to make it successful or even to make it a thing.

And those three things are pre-production production and post-production, so pre-production pertaining to any script. Writing any storyboarding anything that you’d need to do to get prepared for the production and for the post-production. The production is obviously making the thing actually come to life, so the filming or the photography of your subject or whatever you’re shooting it’s. The the bulk of what the story is going to be and in post-production is normally pertain to editing so editing being you’re going to be working with color grading, the sequencing of the clips and just overall making it come together to make it that thing that you Ultimately wanted to create from the beginning from the pre-production.

I want to break this article down to show you guys kind of how I made a article for super 73 in launch of their new line of bikes called the super 73 R series. I was hired to create a smaller commercial for them, along with a few other filmmakers, and we had to work together to shoot multiple locations in a certain amount of time. I think we had about a week of time to shoot the bike in tons of different locations without showing the crowd or the public the bike.

So we had to be very stealthy in the way that we were shooting and where we were shooting to make sure that there weren’t any leaks of the actual product and with location you typically have to work with the client on set. Super 73 is such a great company to work with, and I was thankful to have them on set in this situation, because there’s so many little things that needed to be captured. It just makes it easy to always have the client on set, because you can work together and that’s the fun part.

You know that’s the fun thing about being a freelance filmmaker or just you know somebody just trying to make extra money when you’re working with a client, it’s extremely important that you’re not sacrificing your style and your talent as a filmmaker, but that you’re still being open With the client and listening to what they want, because ultimately they’re the ones that are paying you and you need to provide them with the value that they’re requesting communication is key.

So aside from the whole communication location, that’s still kind of a little bit of pre-production, but getting into the actual filming was the fun part. So I got the opportunity to be able to hang outside of the back of a Prius thanks to super 73. For one of their employees, hooking it up Taylor. Thank you. This is the kind of shots that we had to get. We wanted to get nice and low, and in order to get that, I had to make sure that I was strapped in and that I had the right tools and so for that I have my trusty Ronin big old thing.

As you can see, it’s still dusty from it, I have to actually clean it yeah we’ll get to that. That was one of the main things that we used. The second thing being the drone. The drone came in pretty clutch in a lot of situations and, of course, audio audio is extremely important. I didn’t get to use as much audio as I hoped for for this shoot, because the visuals were way more important. But audio is extremely important too, because it helps bring depth to your film, the Edit that they wanted had a lot of music and so with the music.

The audio kind of gets dumbed down a little bit which in this case, worked out because we were pressed on time. So anything my general rule is that anything that moves in an image, not the image itself. You know it’s not the camera movement whatever is moving inside of the image needs to have audio some form of audio, always recreate that in post for this film, we weren’t able to capture too much of the natural sound that the bike makes on the road.

So what I did is actually went in and slowed down the sound of raindrops and that made it sound like the tires were spinning on the road. Those are things that you can do to get creative and that’s what they do in big movies. You know that what I did was a very cheap way of doing it, but you know it helps so find ways to add depth. That’s in the post-production side, but when you’re on set it’s always great, to have some sort of backup audio.

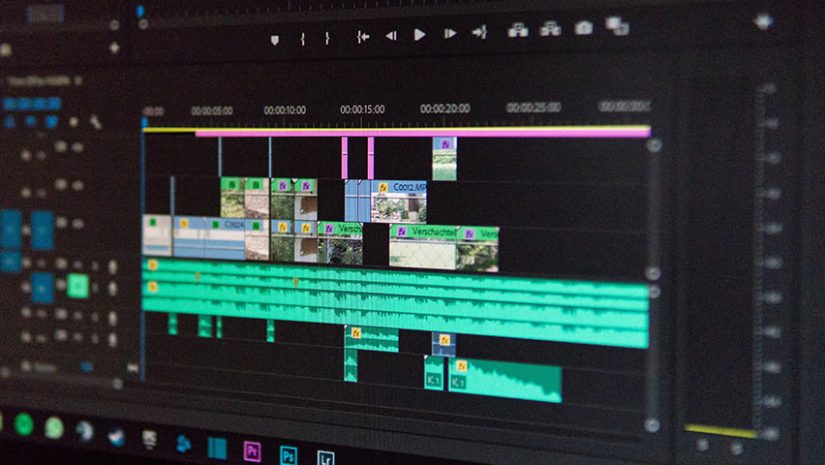
So I have my main road into g3, but I had a second filmer who was capturing second audio, which is great, okay, so post-production to break it down nice and simple, because editing can be so complex to break it down. When you have your footage, I just had a little bit of a brain fart. What I normally do is I organize all of my files in finder itself, so I have it on a Mac, and with that I add all my cameras.

I had all the days at all my audio all my music, everything that I need to start editing right so that I can just sit down and just work through. It not have to go through and search everything. I first do all of that and then bring it into my editing program, Premiere Pro and then start creating selects is what they call it. So you take all of the footage or I label everything with a color. So I know that when I’m editing, I know.

Okay, this is from one day like, for example, I took all the desert clips and I gave them a tan color right then I had California Hills, so I put green on it and those are the things that you can do to make it easier for yourself. When you’re editing so once you have all your footage, colored I’m going to go through and create selects with that footage. I’m basically put all on one timeline I go through.

I use the blade tool I just cut and then I drag up the footage that I want and then once I have that I consolidate all of it and then bring it down and once we start the editing process. If I have multiple shots, that might look the same, but there’s a little bit of difference like maybe the rider does a different move, but this shot is still the same. I still keep those shots and then figure out which one fits best with the music and work my way through that.

So once all of your selects have been made and you’re ready to begin the editing process, I drag in my music and then I go through my music and I first find out how long they want as a film right. That’s in the pre-production side. So I turned down the music. I try to find the moments where they kind of match. So if it’s a 3-minute song and they want a 45 second edit, I have to find a moment where it builds up and then it kind of fades out.

So I have to cut the music down and figure out where the best parts are and then make that into 45 seconds. And then I start beginning the editing process where I can take. All of my highlights bring it over and I create a timeline send it over to the client once they’re happy with a basis starting line. You can start adding effects your color grading and then more sound then continue the revision process from there.

Hopefully, you guys learned something new that you can take and scale up your business, somehow there’s photo or film. Thank you guys for reading. I will see you guys in the next one.


Videos are truly an awesome way to get the point across. Any type of content from your business is important!


Categories
Online Marketing

Mobile graphy Tutorial (Shooting & Editing)

So you’re probably wondering why I like to use my phone when shooting a video. There are couple reasons behind it. The main reason being the convenience: it’s really easy to just take your phone out of your pocket and start shooting right away. Second reason why I like to shoot with my phone is because of the homely atmosphere you can create with your phone footage.

That’s going to look really nice when you’re blending all the different type of footage together to create a final product. So in this article I’m going to give you guys a couple of tips and tricks. Now I like to use when I’m shooting with my pocket. So the first step I’d like to talk about is the camera settings and I normally like to shoot at 1080p at 60 frames per second just to keep all the file size down and, of course, have the ability to slow down the footage in post production.

So another quick tip I like to briefly talk about, is you have to shoot in a landscape mode? So what essentially happens when you shoot in portrait mode? Is that you’re going to get this really annoying forest like black bars at the side, and when you go on and scale the footage you’re going to lose a lot of image quality so always use the landscape and you’re going to have no problems regarding so another? Very important tip I like to talk about is the use of in camera transitions when you’re shooting.

What I mean by that is. You want to take plenty of shots with a lot of movements, movements and there’s simple panning or dolly shot there on an edit you’ll. Have so much flexibility, you can speed around even cut you’re going to do pretty much anything you wan na do and yeah plenty of in-camera transition. So another important tip I like to talk about is you have to make the most out of for your phone operator? What I mean by that is most of the modern phones if they have functions such as time-lapse mode portrait mode, and you really have to start using those different functionalities in your mobile device to get the best out of you.

So the last few tips I’d like to talk about is the use of dedicated article apps that allows you to manually change is so shutter speed and aperture. This is so that you don’t experience any random changes of exposure in your footage, while you’re shooting all right guys. So, as you can see, I’m in my editing desk and since this article is an association with film or a pro, I will be using this software to edit this article.

What I’m going to do now is create a new project. Okay, so I’ve opened up film or Perl, and this is what the interface looks like you’ll. Have your viewers tab here, tremor control scopes, text layout and your effects are in here, so what I’m going to do now is I’m going to import some of the footage? Okay, so, as you can see, I’ve imported pretty much everything and what I’m going to do now is I’m going to create a new folder to keep everything organized.

So I’m going to call it I phone 8, so I’m going to make another folder and call it an audio just to keep everything organized like I said, I’m just going to place it in there. So you can see. I have the article folder and the audio folder now, so what I’m going to do now is I’m going to import all these footage into the timeline. How tomorrow works is pretty much identical to how premier works. So what you want to do is vessei.

You want to start a clip from here. You just press, I and you want to end the clip around here, press o and since I just want the article I’m just going to drag the article there. So I’m going to place it down here and there you go it’s as easy as that, as you can see, your preview is right here, I’m going to make a bit more bigger because I like working in a bigger workspace, okay. So what I’m going to do now is I’m going to do the same process for every single footage.

Just so I select everything and I know what I’m working with. So what I’m going to be doing now is I’m going to try and reposition pretty much all these shots so that they match and I’m going to explain to you guys why I’m doing this process. So what I’ve done here is I’ve created these six different sequences, which I’m going to be using footage from to create a final sequence. So, as you can see from the sequence, this little sequence has all the shots that is either planning this way or planning.

This way, this shot is panning from left to right, this shiz band from left to right discharge pan from so that is all the footage that I have that is panning from left to right and in this sequence the camera is panning from up to down. So up to down or down to up so what I can essentially do is, I can just reverse the shot and create that up to down motion, so this is down to up up to down up to down down to up.

So what I’m going to be doing in the final sequences that I’m going to be speed, ramping, the start and the end? So once I speed ramp the boat ends, I’m going to get that really smooth up to down motion. So now I am planning to create the final sequence and I want to play shots in a way that there’s a story behind it, so I’m looking for an establishing shot. First, I think this is a pretty good shot to start with.

So what I want to do with this shot is, I want to make it into a slow most and I’m going to set the speed to about 50 % right. So, as you can see, it has smoothened up. So I’ve left two second gap here just to place the text at the end and what I want to do with this shot is. I want it to kind of fade from black, so I’m going to go to transform, go to opacity, go to the first frame, set opacity, zero hit.

https://m.youtube.com/watch?v=X3hzAOzigOU

The keyframe button go about roughly one second in and set up a 300. So what this essentially does it just kind of fades from black into the actual footage? So I think I’m going to make this a bit longer, so I’m just going to drag the keyframe and that’s looking really good. So what I’m going to be doing now is I’m going to create a speed ramp between these two clips. So there are a couple of different ways to do: speed, ramps in forum or a pro.

How I like to do is by simply cutting the end and the start off the shot. I want the transition to be in so after I cut out both the clips. I’m going to right click go to speed duration, and I’m going to set this to around. To 50 %, what I’m going to do now is I’m going to follow the same step to ramp up the end and the start of this. But as you can see, I’m finished creating a sequence and now what I’m going to do is I’m going to start color correcting this footage.

So once I color correct, I’m going to add a couple of sound layers and then finally export the article so right now, I’m going to show you guys the final article, the final output of what we created in filmora pro so guys. This is what we created with the iPhone footage on the Fillmore Pro. I hope that you learned something from this article. I hope that you enjoy it. Just remember you don’t need an expensive camera when you starting off.

All you need is a good editing. Software and just a phone, I shot many articles with iPhone 4 for, like two months before finally buying my very first camera. My very first editing software was also from aura. I just find it really user friendly. I definitely do think that, if you’re starting off your YouTube career, this is the software that you need to go after check it out. I’ll put the link in the description below where you can get it for free, and I will also put the download link off the files in the description.

So you can try it out yourself and once you edit, all those footage, make sure to tag me if you’re floating on your social media platform I’ll be sure to give feedback on every one of you guys. So I hope they enjoyed reading this article and I’ll see you in the next article


Videos are truly an awesome way to get the point across. Any type of content from your business is important!