The bad news, however, is that, even with these improvements, a lot of websites still won’t magically turn into speedy experiences. I mean think about it for a second, if you had a bus station and click on a link in your Twitter feed, you wait five seconds.
You wait. 10, you keep thinking. It must be amazing content. If it takes so long to prepare and write, then you get pulled back into reality. A full screen interstitial asking me to buy sunscreen, please, like me, dialog that’s, set to scratch from the content and make the page so small, you can’t even scroll and as if that was enough, a bunch of competing analytics scripts in the background at party hard.
Every second and kill your phone’s battery, or maybe the analytics scripts, just want to stop the phone from suffering and put it out of its misery quickly. I really don’t know in all seriousness, though: all of this wouldn’t be such a big deal for the publishers of those sites. If you were just willing to continue to suffer, but you don’t you’re furious about the current state so furious, then you either don’t bother and click off and studies to just a 40 % of users drop off after just three seconds or decide to install an ad Blocker clicking off is a lose-lose situation.
You are frustrated because you didn’t get to read the article. Your friends post it and publishers are frustrated because they didn’t get a chance to show you other great stuff and relevant ads to help pay to create that free content. An ad blockers might work for you as a reader, but hand the business model of many publishers that depend on ads to help pay for the content offered. But here’s the thing, publishers, obviously don’t – purposely – try to slow down pages.
They add all of these extras to try to increase the monetization of their site and attract more and more readers to help keep the site on business, and then they end up in a tough spot where they feel they need to decide between improving the user experience Or focusing on monetization and user acquisition, these overloaded user unfriendly web sites aren’t a new problem and some have tried to come up with solutions.
The FIR our walled gardens that lock you to a specific content distribution platform. Now you have to implement a custom solution for every single platform and your content cannot be discovered through search engines or link to from other websites by by open web, or you could create a native app and lose even more advantage. The web offers like effortless entry without install or easy distribution of content not terribly attractive either.
We felt this was a problem in need of a simple and elegant solution, a new way to implement an issue, a beautiful, streamlined, wicked, fast content web pages. Without all the extra clutter that is built on the openness of the web and doesn’t try to replace it, it allows everyone to participate and collaborate that publishes platforms and developers all stand behind and benefit from. That’s short.
What accelerated in the open the EM project dramatically improves the performance of mobile sites on the web, often to the point where their load appears to be instant. It’s an open source initiative that relies on existing web technologies and is built in collaboration with many different partners. Many technologies today come with super complicated, build processes, but not so with amp. In fact, an amp 8 is just a normal HTML website with a couple of restrictions and extras no build process, no extra step, because of that it doesn’t require a lot of additional work.
Unlike having to build custom, apps and products for a myriad of platforms and social outlets, in fact, if your website doesn’t use custom JavaScript and is mostly static, you probably don’t even have to create a second version of it for app. Every amp document includes the MJS JavaScript library that delivers optimum performance by adding and validating a few important rules in your markup when looking at an amp document.
The biggest difference you see is that some elements, like the image tag, are replaced with custom elements. That’s done to ensure staying in Fastlane in two critical situations. First, it allows MJS to control the entire load chain and prioritize certain elements and requests over others. In practice. This means that most third-party content and elements below default I’ll load it after the main content arise.
So your users can start reading as soon as possible. Second, ms custom properties strictly required a width, height or other aspect ratio defining attributes to be set. This way, mj’s knows exactly how your page will look like before any assets are loaded and can layout the page. In advance, this prevents the famous flash of unstyled content, the ugliness of a half lured website. That then starts to jump around by loading more stuff, as well as the need to re-render and do additional layout calculations, a browser task that can be very slow.
Every single imitational addition to amp documents is carefully designed to end up the speed of the page 211 and implement rail. A user experience focus performance model, but the chrome team came up with and because MJS comes with a built-in validator that locks to the console. It ensures developers Fastlane as nothing is more frustrating than a speed regression you discovering month later on an end page.
The content is always King and the user experience is Queen no compromises. But if you now say wait, a sec sounds great for users, but how does this help publishers, consider this users love fast content and amp allows platforms like Google, Twitter, Pinterest or LinkedIn to know for a fact that this content is fast, which they can then promise To users in return, if I know it only takes me five seconds to read that article, I do it much more often with many more articles, I’m happy.
The platforms are happy because I’m happy and the publishers is happy because they get to show me more content and just like that everybody wins get started. Writing your first and page today by checking out two tutorials in the description or head directly to am project org to learn more
Your PWA is still a webpage that customers can find in their usual ways. You want to apply reasonable search engine optimization and ensure the page is available to search engines. You can use JavaScript on your pages and Google will index it as long as you follow some best practices. You can use the fetch as Google tool from the Google webmasters site to see how your app looks when crawled discoverability helps get customers to your site.
But how can you measure their behaviors once they get there? That’s where analytics comes in Google Analytics is a service that collects processes and reports, data about an applications, use patterns and performance. Adding Google Analytics to a web application enables the collection of data like visitor traffic, user agent, the user’s location, etc. This data is sent to Google Analytics servers where it’s processed.
The reports are available in the Google Analytics web interface and through a reporting API, Google Analytics is free and highly customisable. Integrating Google Analytics is simple. First, you must create a Google Analytics account. Each account has properties, and these aren’t JavaScript properties, but refer to individual applications or websites. Google Analytics then generates a tracking snippet for each property.
This is a piece of JavaScript that you pasted into your page. It sends data to the Google Analytics back-end. You can also use the analytics library to create custom analytics, such as tracking specific user actions or tracking push notifications. I want to say a bit more about properties. An account has properties that represent individual collections of data. These properties have property, IDs, also called tracking IDs.
That identify them to Google Analytics if an account represents a company. One property in that account might represent the company’s website, while another property might represent the company’s mobile application. If you only have one app, the simplest scenario is to create a single Google Analytics, account and add a single property to that account. This is the key part of the tracking snippet.
The entire snippet needs to be pasted into every page. You want to track at a high level when this script runs. It creates an async script tag that downloads analytics AS the analytics library it defines the GA function called the command queue. It creates a tracker that gathers user data and it sends this data as a pageview hit via HTTP request to Google Analytics. This data is analyzed in stored in your analytics account.
In addition to the data gathered by tracker creation, the page view event allows Google Analytics to infer what pages the user is visiting, how long they are visiting them and in what order for simpler applications. This is the only coding required note. You can replace analytics GS with analytics underscore debug KS for console debugging. Using this version will log detailed messages to the console for each hit, sent it also logs warnings and errors for your tracking code.
The data is sent to Google Analytics backend where it is processed into reports. These reports are available through the Google Analytics dashboard. Here is the audience overview interface. Here you can see general information such as page view, records bounce rate, ratio of new and returning visitors and other statistics. You can also see specific information like a visitor’s language, country, city, browser operating system, service provider, screen resolution and device.
Here we are looking at the user City, it’s also possible to view the analytics information in real time. This interface allows you to see hits as they occur on your site. I encourage you to take some time and explore there’s an extensive set of features in the dashboard. You should explore the standard reports and look at creating your own. Knowing how to use analytics for improving your business or increasing revenue is a skill within itself.
Fortunately, the Google Analytics Academy offers a free set of online courses. Google Analytics supports custom events that allow fine, grained analysis of user behavior. This code uses the G a command Q, which is defined in the tracking snippet. The send command is used to send an analytics event. Values associated with the event are as parameters. These values represent the event, category event, action and event label.
All of these are arbitrary and used to organize events. These custom events allow us to deeply understand user interactions with our site. For example, here we are sending a view more event. This might be used to indicate that the user has viewed an item from our site. The event label tells us that it was a premium product. I mentioned earlier that you might use events to track push notifications.
You can add events to fire when users subscribe or unsubscribe to push notifications as well as when there is an error in a subscription process. This can give you an understanding of how many users are subscribing or unsubscribing to your app here. We send a subscribe event, letting us know that a user has subscribed to our notifications. Let’s talk about what happens when analytics meets service workers, they won’t work without a little help.
That’s because the service worker script runs on its own thread and doesn’t have access to the GA command queue object established by the tracking snippet code on the main thread. It also requires the window object. Service workers must use the measurement protocol API instead of the command Q. This is a simple set of HTTP parameters documented at the Google Analytics site. Here’s an example of recording when the user closes a push notification.
The service worker manages the notification lifecycle, so it receives a notification close event when the event fires, the service worker, sends a hit via post with tracking ID custom event parameters and the required parameters for the API. Remember that we don’t want this service worker to shut down before we complete the post, so we wrap this code in event. Wait until since hits are effectively HTTP requests, they can’t be sent if the user is offline using service worker and indexeddb hits can be stored when users are offline and sent it a later time when they have reconnected.
Fortunately, the SW offline, google analytics and PM package abstracts this process for us to integrate offline analytics, install the package in your project with the npm install command. Then, in the service worker script import, the offline, google analytics import, je and initialize. The google and google analytics object. This adds a fetch event handler to the serviceworker that only listens for requests made to the Google Analytics domain.
The handler attempts to send Google Analytics normally if the network request fails, it will be stored in indexdb. Instead, the stored hits will be resent when online. You can test this behavior by enabling offline mode in developer tools and then triggering Google Analytics hits on your app indexdb will show a list of urls that represent the unsent hit requests. You may need to click the Refresh icon inside the indexdb interface to see them.
If you disable offline mode and refresh the page, you should see that the urls are cleared indicating that they have been sent now. It’s your turn. Go to the analytics API lab in there. You will create an account, add analytics to an app look at the results and make this work in a progressive web, app good luck and have fun if you’re an instructor. This final slide links to more information on analytics.
If you’re a student, these links can be found in your textbook. You may want to use these while you are working on the lab. There are additional slides at the end of this presentation that show the major analytic screens and explain how to get there, use these to deepen your knowledge or create live demonstrations. You
The bad news, however, is that, even with these improvements, a lot of websites still won’t magically turn into speedy experiences. I mean think about it for a second, if you had a bus station and click on a link in your Twitter feed, you wait five seconds.
You wait. 10, you keep thinking. It must be amazing content. If it takes so long to prepare and write, then you get pulled back into reality. A full screen interstitial asking me to buy sunscreen, please, like me, dialog that’s, set to scratch from the content and make the page so small, you can’t even scroll and as if that was enough, a bunch of competing analytics scripts in the background at party hard.
Every second and kill your phone’s battery, or maybe the analytics scripts, just want to stop the phone from suffering and put it out of its misery quickly. I really don’t know in all seriousness, though: all of this wouldn’t be such a big deal for the publishers of those sites. If you were just willing to continue to suffer, but you don’t you’re furious about the current state so furious, then you either don’t bother and click off and studies to just a 40 % of users drop off after just three seconds or decide to install an ad Blocker clicking off is a lose-lose situation.
You are frustrated because you didn’t get to read the article. Your friends post it and publishers are frustrated because they didn’t get a chance to show you other great stuff and relevant ads to help pay to create that free content. An ad blockers might work for you as a reader, but hand the business model of many publishers that depend on ads to help pay for the content offered. But here’s the thing, publishers, obviously don’t – purposely – try to slow down pages.
They add all of these extras to try to increase the monetization of their site and attract more and more readers to help keep the site on business, and then they end up in a tough spot where they feel they need to decide between improving the user experience Or focusing on monetization and user acquisition, these overloaded user unfriendly web sites aren’t a new problem and some have tried to come up with solutions.
The FIR our walled gardens that lock you to a specific content distribution platform. Now you have to implement a custom solution for every single platform and your content cannot be discovered through search engines or link to from other websites by by open web, or you could create a native app and lose even more advantage. The web offers like effortless entry without install or easy distribution of content not terribly attractive either.
We felt this was a problem in need of a simple and elegant solution, a new way to implement an issue, a beautiful, streamlined, wicked, fast content web pages. Without all the extra clutter that is built on the openness of the web and doesn’t try to replace it, it allows everyone to participate and collaborate that publishes platforms and developers all stand behind and benefit from. That’s short.
What accelerated in the open the EM project dramatically improves the performance of mobile sites on the web, often to the point where their load appears to be instant. It’s an open source initiative that relies on existing web technologies and is built in collaboration with many different partners. Many technologies today come with super complicated, build processes, but not so with amp. In fact, an amp 8 is just a normal HTML website with a couple of restrictions and extras no build process, no extra step, because of that it doesn’t require a lot of additional work.
Unlike having to build custom, apps and products for a myriad of platforms and social outlets, in fact, if your website doesn’t use custom JavaScript and is mostly static, you probably don’t even have to create a second version of it for app. Every amp document includes the MJS JavaScript library that delivers optimum performance by adding and validating a few important rules in your markup when looking at an amp document.
The biggest difference you see is that some elements, like the image tag, are replaced with custom elements. That’s done to ensure staying in Fastlane in two critical situations. First, it allows MJS to control the entire load chain and prioritize certain elements and requests over others. In practice. This means that most third-party content and elements below default I’ll load it after the main content arise.
So your users can start reading as soon as possible. Second, ms custom properties strictly required a width, height or other aspect ratio defining attributes to be set. This way, mj’s knows exactly how your page will look like before any assets are loaded and can layout the page. In advance, this prevents the famous flash of unstyled content, the ugliness of a half lured website. That then starts to jump around by loading more stuff, as well as the need to re-render and do additional layout calculations, a browser task that can be very slow.
Every single imitational addition to amp documents is carefully designed to end up the speed of the page 211 and implement rail. A user experience focus performance model, but the chrome team came up with and because MJS comes with a built-in validator that locks to the console. It ensures developers Fastlane as nothing is more frustrating than a speed regression you discovering month later on an end page.
The content is always King and the user experience is Queen no compromises. But if you now say wait, a sec sounds great for users, but how does this help publishers, consider this users love fast content and amp allows platforms like Google, Twitter, Pinterest or LinkedIn to know for a fact that this content is fast, which they can then promise To users in return, if I know it only takes me five seconds to read that article, I do it much more often with many more articles, I’m happy.
The platforms are happy because I’m happy and the publishers is happy because they get to show me more content and just like that everybody wins get started. Writing your first and page today by checking out two tutorials in the description or head directly to am project org to learn more
Debugging than you need to this tutorial shows you how to make the most of chrome dev tools so that you can debug your JavaScript as quickly as possible. I’r going to use this buggy demo here to demonstrate all of the debugging tools and dip tools. I recommend that you open up this demo yourself and follow along with each step.
The link is in the description. Whatever issue you’re debugging, you always want to start by reproducing the issue. You want to find a series of actions that consistently reproduces the book in this demo. When I add five and one the result down here at the bottom is 51. Obviously that should be 6. This is the bug that I need to check down at this point. You might be tempted to use console.Log to infer where the code is going wrong.
Sure it may get the job done, but it’s rather inefficient. First, you have to find the relevant code which could take a while on a big code base. Then you have to sprinkle constant log statements throughout the code. Then you got to reload the page and look at the logs, but maybe the logs didn’t give you all the information you need, so you got to go back and add more logs and so on with dev tools.
You can pause the code in the middle of its execution, inspect the variables that are in scope at that moment in time and walk through your code, one line at a time open, dev tools by pressing command option, J on Mac or ctrl shift J on Windows And Linux, then click the sources tab. The sources panel is where you debug JavaScript. It has three main parts at the top left. Here is the file navigator pane, where you can inspect the files that the page uses after clicking on a file.
You can see the contents of it here in the code editor pin and down here is the JavaScript debugging pane, which you’ll learn more about shortly. Note that when your dev tools window is wide, the JavaScript debugging pane moves to the right. If you take a step back and think about how the app works, it’s probably safe to guess that the incorrect sum gets computed in the click event listener that’s associated to the button.
Therefore, you want to pause code right when the eventlistener executes event.Listen their breakpoints. Let you do exactly that. Expand the eventlistener breakpoint section then expand the mouse category then check the click check, box, dev tools now pauses on the first line of any click event listener that executes back in the demo, click the button again and dev tools. Pauses on the first line of this on-click function, the blue highlight indicates what line of code you’re currently paused on, if you’re paused on a different line of code press resume script execution until you’re paused on the correct line you paused on the wrong line, because you Have a Chrome extension which registers click event listeners on every page that you visit.
If you try the workflow I’m describing in an incognito window, you can see that you always pause on the correct line of code event. Listener, breakpoints are just one type of a breakpoint. Dev tools offers many other types. For example, you can set a breakpoint on a specific line of code or when a Dom node changes or when an exception gets thrown and so on. After this tutorial, I recommend checking out our breakpoints guide, which teaches you when and how to use each type.
The link to that guide is in the description too, I’m paused in the click listener, and now I want to execute the code one line at a time. The code stepping control is right here. Let you do that click. The step into next function call button to investigate a function further. For example, when I step into the inputs our empty function, it jumps me to the first line of that function when I’m confident that a function is working as expected, I can click the step over next function call button the function executes, but I don’t walk through It line by line, for example, if I click to step into the next function, call this line here would be highlighted, blue meaning.
This is where I’m currently paused, but when I click step over next function, call the function executes to completion and I pause them. The next line of the function that I’m currently stepping through last suppose, I’m stepping through a function, and I realize it’s not relevant to my bug. In that case, I can press step out of current function and dev tools executes the rest of the function. If this doesn’t make complete sense right now, I recommend creating a snippet, which is a little block of JavaScript code, that you can execute at any time set a breakpoint and your snippet and play around with the code stepping controls yourself in order to understand how they All work back in the script, I can tell that the bug is probably somewhere in the update label function rather than stepping through a bunch of irrelevant code.
I can set a line of code breakpoint right around where the bug probably occurs to do that. I just click the line number next to the code. This blue icon indicates that there’s a breakpoint on this line when I press resume script, execution dip tools runs all the code up until that lime and then pauses before that line executes over here in the JavaScript debugging pane. I can see the call stack that caused this code to execute.
I can click on the functions to see where each one got caught. The scope section shows me all the local and global variables that are currently defined at this moment in time. I can click on values to edit them, but I’m not going to do that right now. However, when I look at these values, they look suspicious they’re, wrapped in double quotes, which means that their strings. This could be the cause of the book.
I’r going to investigate this further over in the read expressions section here. I can read the values of variables over time. You can store any valid JavaScript expression here, for example, I click, Add expression, then type type of sum then press enter, and I can now see the value of that expression, as I suspected sum is a string when it should be an integer. Now I’m going to open up the console to test out a potential fix for the book when I’m paused on a line of code, the console has access to all the variables that are currently in scope.
For example, when I evaluate addend 1, it returns 5. I think I can fix this bug by converting the addend 1 and adding two variables two integers before adding them. So let me try that now yep that fixes it. I can verify that this change fixes the bug by editing the code directly from dev tools. First I’ll resume script. Execution then make my change, save the change. I press command s on Mac or ctrl s on Windows and Linux.
Then I click deactivate breakpoints so that I can test out the app without triggering the breakpoints I’ve set. Now the app sums up numbers as expected, all right, you now have an excellent foundation and how to effectively debug JavaScript using dev tools from here. I recommend learning about all the breakpoints that dev tools has to offer. As I mentioned before, we also have a JavaScript debugging reference where you can learn about literally every feature related to debugging in dev tools.
Links to both are in the description thanks for reading and happy bug, hunting
This diagram gives an overview on the client side. Your webpage interacts with service workers which in turn receive push events via the user agent, also known as the browser and on the backend.
You send messages from your application server to the push service, which then delivers them to the correct client. Let’s look at the notification API first, this allows developers to display notifications to the user. Before we can create a notification. We need to get permission from the user. This code will prompt the user permissions to show notifications. You can try this out from the browser console as you’ll see later, permission is requested automatically when subscribing to a push service.
So there’s no need to call this function when using just push notifications. Let’s take a look at some examples for configuring and displaying a notification from a service worker. We first check that permission has been granted. Then we call show notification on the service worker registration object and pass in the notification title. You can also try this out from the browser console. Try it on the new tab page now for push notifications.
You call show notification in the service worker in response to a push event. When a message arrives, we can specify an optional options: object to configure the notification. This is passed in as the second argument. In the show notification function, the body property is the body text displayed below the title icon? Is the image displayed at the top of notification? Vibrate is the vibration pattern for phones, in this case 100 milliseconds on 15 milliseconds off 130 seconds on so on, data is the arbitrary data we can retrieve in the service worker when the user interacts with the modification.
In this example, primarykey allows us to identify which notification was clicked when handling the interaction in the serviceworker. Let’s try that out. We can add action buttons to the notification that we can then handle each in a different way. Here’s what that looks like notification, interaction events are handled in the service worker tapping clicking or closing the notification. There are two notification interactions you can listen for in the service worker notification.
Close the notification close event only triggers when the notification is dismissed via a direct action on the notification. If the user dismisses all notifications, the event will not trigger, and this is done to save resources, notification, click. If the user clicks the notification or an action button in the notification, the notification click event is triggered. If the user clicked on an action, the action is attached to the event object of the notification click handler.
We can check which action was triggered and handle it separately. Now, let’s see how the two handlers work in a service worker. First notification close: we access the notification, object from the event object and we can get the data from the notification object. We might use the primary key property from the data to identify which notification was clicked in a notification click handler. We can determine what action button.
The user pressed by inspecting the action property on the event object. Note that each browser displays notification actions differently and some don’t display them at all to compensate. We put a default experience in this example in an else block after checking which action was clicked so that something will happen on a simple click of the notification. Now, let’s see how you send push messages from your server and handle incoming messages on your client web app.
Each browser manages push notifications through its own system called a push service when a user grants permission for push on your site, you subscribe them to the brow. Push service: this creates a subscription object that includes a public key to enable messages to be encrypted and an endpoint URL for the browser’s push service, which is unique for each user from your server. Send your push messages to this URL encrypted with the public key.
The push service sends the message to the right client. Now the service worker will be woken up to handle incoming push messages when a push event is fired, and this allows your app to react to push messages. For example, by displaying a notification using service worker registration show notification, your app doesn’t need to listen to or Pole for messages and the browser doesn’t even need to be open.
All the work is done under the hood as efficiently as possible by the browser and the operating system, and this is great for saving battery and CPU usage. Let’s go through that step by step in the apps main JavaScript call push manager subscribe on the serviceworker registration object, get the subscription object and convert it to jason, get the endpoint URL and public key and save this to your server, for example, by using a fetch Request send the message payload from your server to the endpoint URL encrypted with the public key.
The push message raises a push event in a serviceworker which we can handle in a push event handler in push event handler. We get the data from the message and display a notification. The push API allows users to subscribe to messages sent from your app server that are sent via the push service used by the browser and subscribing, of course, is done in the JavaScript. For the page, responding to push events, for example by displaying a notification, is done in the serviceworker, just to repeat subscribing to the push service and getting the subscription object happen in the JavaScript for the page.
First, we check if the user is already subscribed and update the page UI accordingly, if they are not subscribed, prompt them to subscribe, if they are already subscribed, update the server with the latest since that may have changed by the push service, since it was last used When the user grants permission for push on your site, you subscribe them to the browsers push service, as I said before, this creates a special subscription object that contains the endpoint URL for the push service, which is different for each browser, along with a public key.
We send the subscription object for this user to the server and save it now before you subscribe a user check if you already have a subscription object, if you don’t have the object again update the UI to prompt the user to enable push notifications, and if you Do have the subscription object, update your server database with the latest subscription object. The ready property of the service worker defines whether a service worker is ready to control the page or not.
It returns a promise which resolves to a serviceworker registration object. When the service worker becomes active, the get subscription function returns the subscription object or undefined. If it doesn’t exist, we need to perform this check every time. The user accesses our app because it is possible for subscription objects to change during their lifetime. This is the process of subscribing to the push service register, the service worker from the main page main jeaious.
This request goes to the user agent. The user agent returns the service worker registration, object, use the service worker at registration, object to access the push manager API and from that requests are subscribed to the push service. This request is passed on to the push service. The push service returns. The subscription object, which includes the endpoint URL and the public key, save the subscription object data to your server and send push messages from your server to the endpoint URL encrypted with the public key.
Like I said now before sending notifications, we must subscribe to a push service. We call push manager subscribe on the service worker registration object to subscribe and the resulting push subscription object includes all the information. The application needs to send a push me such an endpoint and encryption key needed for sending data each subscription is unique to a service worker. The end point for the subscription is a unique capability.
Url knowledge of the endpoint is all that is necessary to send a message to your application. The endpoint URL therefore needs to be kept secret or other applications might be able to send push messages to your application. Here’s an example of the subscription object. This is the object returned from the push service. When we call reg push manage, add subscribe. The subscription object has two parts.
The first part is an endpoint URL. The address on the push service to send messages to this includes an ID that enables the push service to send a message to the correct client and service worker. The second part of the subscription object is the keys property. The p25 6d H key is an elliptic curve, diffie-hellman ECD H public key for message. Encryption. The earth key is an authentication secret that your application server uses in authentication of its messages.
These keys are used by your application, server to encrypt and authenticate messages for the push subscription and, let’s see how the process of sending a message is done. The server generates a message encrypted with the public key and then sends it to the endpoint URL in the subscription object. The URL contains the address of the push service along with subscription ID, which allows the push service to identify the client to receive the message.
The message is received in the push service which routed to the right, client and the process of sending a push message from the server works. Like this. A back-end service on your server sends a push message to the push service using the endpoint URL from the subscription object. The message must be encrypted with the public key from the subscription object. The push service uses subscription IDs encoded in the endpoint URL, to send the message to the right user agent.
The push event is picked up by the service worker. The service worker gets the data from the message and displays a notification in this example. We’re using Google’s web push library for nodejs to send a push message from a node.Js server. The TTL value in the options specifies the time in seconds that the push service should keep trying to deliver the message now. This is important to set correctly some messages.
Have a short life some may be valid for several hours or more. We then pass in the subscription object. Payload and options object to send notification. You need a way to ensure secure communication between the user and your server and between your server and the push service and between the push service and the user. In other words, the user needs to be sure that messages are from the domain. They claim to be from and have not been tampered with by the push service you need to make sure the user is who they claim to be valid, was created to solve this problem.
This vapid identification information can be used by the push service to attribute requests that are made by the same application server to a single entity. This can be used to reduce the secrecy for push subscription URLs by being able to restrict subscriptions to a specific application server. An application server is further able to include additional information. The operator of a push service can use to contact the operator of the application server in order to use vapid, we need to generate a public/private key pair and subscribe to the push service using the public key.
The public key must be first converted from URL base64 to a you in 8 array. This is then passed into the application. Server key parameter in the subscribed method. The web push library, provides a method generate vapid keys, which generates the keys. This should be used once in the command line when push generate vapid, keys, Jason and the keys stored somewhere safe. We can use the web push library to send a message with the required vapid details.
We add a vapid details, object in the options parameter. That includes the parameter required for the request signing now. Let’s look at messages from the receiving end in the web. App on the client handling push, events happens in the surface worker, the service worker will be woken up to handle incoming push messages and a push event is fired. This allows your app to react to push messages, for example, by displaying a notification using service worker registration, show notification to display a push notification.
You listen for the push event in the service worker. You get the push message. Data from the push event object in this example, we simply convert the message: data to text The Wrap, show notification in a wait until to extend the lifetime of the push event. Until the show notification promise resolves, the push event will not be reported as successfully completed until the notification has displayed.
You can practice working with the notification and the push API by following the lab that accompanies this article, one small gotcha, don’t use private or incognito mode for this lab for security reasons, push notifications are not supported in private or incognito mode. You
This replaces the payment forms on a site with a much simpler experience on mobile devices. So let’s talk about paying for things on the web. This is a longer talk, so let me give you an idea of what’s coming up. First, we’ll talk about the user experience today and what could be better, we’ll look at the payment request, API twice.
First, to give you the big picture, then we’ll dive into the code. Finally, you’ll get the usual resources in lab. It’s no surprise, given the rise of mobile computing, that a majority of commercial traffic is coming from mobile devices, what is surprising is that 66 % of that mobile commerce is still happening on the web, even when people have native apps installed. Unfortunately, we also see a lot lower conversion rate on mobile web relative to desktop websites.
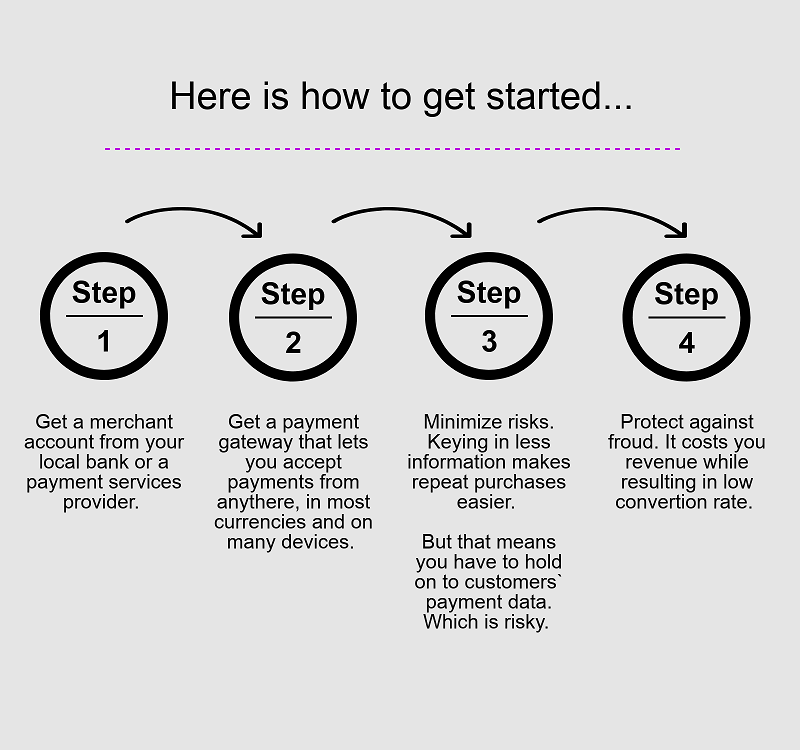
Mobile conversions are about one third of the desktop conversions. If you wonder why this is the answer is pretty simple. Checking out collecting payment from the user is still rather messy. People often give up while filling the checkout form some checkout forms have improved since the beginning of web Commerce. What hasn’t changed is you still have to manually input the same information credit card billing address and shipping address? Our first step to solving this problem is autofill, because autofill works on existing forms.
You don’t have to modify your site. Autofill just works to help users check out faster autofill alone increases conversion rates by 25 %. Autofill does a good job of identifying form fields, but it’s not perfect. If you want an even better experience, you can have the autocomplete attribute to your forms. In this example, we’ve annotated the credit card portion of a form using values such as CC name and CC.
Number autofill will know exactly where to place its information. If you want to learn more about autocomplete attributes search the web, using what WG autofill to find the specification, autofill gets rid of the manual nature of data entry and makes it much simpler for the user. The current checkout experience presents you with a form to fill out every time for users, though the ideal experience would be that, when it’s time to buy they just buy site should be able to focus on creating an amazing and engaging shopping experience without worrying about optimizing.
A long checkout form this is where the payment request API comes in, we’re going to look at it first from a user perspective and then look at the code. What if we could do away with the form using web payments when it’s time to pay the user? Just pays payment request is a simple JavaScript API that helps the browser collect payment information. Then it’s a simple one: tap checkout for the user and an easy way for a site to receive a payment.
With the payment request API, you can make the whole process much faster and simpler and since the browser is actually taking care of collecting payment information from the user, we go from end taps to one tap. Let’s take a quick look at the code flow here. First, the site initiates a payment request in this request. The website passes to the browser the parameters of the payment, for example, how much is being charged and the available forms of payment? Don’t worry about the details now we’ll come back in a few minutes and look at this in detail.
The browser then determines the intersection of payment methods from the site and what the user has. It then presents a selection UI where the user chooses their method of payment. You get the UI by calling show this displays a native UI over the browser within this UI, the user can change how to pay the delivery method and the delivery address. The payment method can be credit cards or one of the apps that’s installed on their device, such as Android pay and, finally, the user taps on pay.
Then the browser requests a response from the selected payment method. This might be an app on your device or going directly to a payment provider. The payment processor verifies the request by examining its details and then returns the response directly to the server and the website now has all the information it needs to process the payment. Is this safe? The API is more secure than forum based payments.
The new payments are based on modern cryptography. You don’t need to enter payment data that could be logged or observed at the point of entry. Autofill is safe from website access and is typically stored. An encrypted storage on the hard drive to prevent disclosure, even when the OS is compromised payment request, is not just a chrome only API. The API is currently under development in the w3c web payments working group.
The goal is to create a universal cross browser standard for any website to accept any form of payment so to review payment requests, eliminates manual and tedious entry by storing the user’s information securely in the browser. The browser passes, addresses and credit card details immediately and securely to the site, and since the browser is collecting payment information from the user, we go from end taps to one tap: you’ve seen how payment request works for the user.
Now, let’s go over the code in more detail. First, a quick review. The site initiates a payment request in this request. The website passes to the browser the parameters of the payment, including the price and the payment methods accepted. The browser determines the intersection of payment methods for the site and the user and presents a selection. Ui payment can be anything from a simple credit card payment to a payment application installed on the user’s device.
The browser requests a response from the selected payment method and returns the response directly to the merchant. There are multiple code samples for this on: Google, Chrome, github, dot, io. Let’s start writing some code. Step 1 is to tell payment requests. All the ways you can get paid. Step 2 is to define the details about the actual transaction cost items, currency, shipping options and so on.
Here’s an example of how you would define shipping options notice. The selected bit you can include this: if you have multiple options, the browser will tell you which one the user selects step 3 is to define what information you want. The API to collect. Take the three data structures you just created and pass them to the payment request. Constructor. You often do this when the user indicates they’re ready to pay, take the request and call it show method.
This returns a promise and opens the user interface. The UI shows the details of the purchase and collects payment information when the user approves the prom resolves with a payment response object. Next, you should check that the payment is valid. Send the information to your payment processor for processing the UI will show a spinner while the request takes place when a request comes back, call complete to close the UI.
The complete method tells the user agent that the user interaction is over. The payment response object contains everything needed to submit a payment for credit card payments. The response is standardized for non credit card payments such as Android pay. The response will be documented by the provider. There’s one loose end to tie up what happens if the user changes their shipping address or options.
This may change the total cost and in some cases, may change the shipping options. Payment requests can omit shipping address, change and shipping option change events. You should add event. Listeners for these and update the payment details. Accordingly, the sample code will show you how and that’s it. You can find a full set of resource links on this final slide. You may have noticed. I didn’t mention a lab, we’re just finishing it up at the time of filming, so check your lab notebook for a complete ecommerce example.
Let’s learn how to integrate with the backend. This will allow you to keep sessions and store user data in a database on the server. When I wasn’t caring with backends, you deal with something called ID token. It contains the issuer of this token, which app this is for an expression date and so on.
You can verify the user’s identity and its integrity by examining the ID tokens content. Let’s get started, you can obtain an ID token upon the successful authentication and then send it over to the server using a secure, HTTPS connection on the server side. The retrieved ID token will look pretty cryptic, but don’t worry you can decode verify and extract this information without a network call by using the Google provided.
Client libraries like this note that the client libraries verify most of the information, but you still have to check if AUD, which indicates audience matches your client ID and ISS, which indicates issuer matches either of following strings. Now you can retrieve the users profile information to be used in your app. This ID token includes the same profile information you can get using the JavaScript library on the client.
A quick tip to remember is that if the users email address is already verified by Google, you don’t have to verify it again in your app once the ID token is verified, use su B, which indicates subject as a user ID to store information. Remember don’t use the email address as a primary key for users as it might change in the future. Okay, now you are ready to integrate Google sign-in with back-end in the next article.
I will talk about how to authorize and access Google APs sucks for stopping by station.
Our current recommendation is To let users authenticate first and defer, asking Permissions until you need to access an API In order to use a Google APIs, you have to enable them from The [ BPI ] console Then looking at this page You can find the scope strings that correspond to the Apis, you have enabled Each one of these Represents an API so take note of the ones you need Now. You can make requests from The client or from the server, Let’s look at the client first, There are two steps.
You first need to get a Permission from the user Check if the user has already Granted access to the API using hasGrantedScopes, Otherwise request the Permission by calling grant Use the scope strings. You Obtained in the previous step, Once the permissions Is granted you can make API calls on Behalf of the user To send a request to the Google APIs, you can use gapi, For example, if you want To use a Google drive API at the client Module then drive module with the API version Using client drivers is simple In this case.
I’m grabbing The list of files and folders in the users root directory. Ok, let’s see how we do the Exact same thing: on the server side, Getting the user’s permission, Happens on the client side Use grantOfflineAccess To get a permission, Offline means that You can access Google APIs, even when the user Is not using the application Upon user’s consent, your Client will receive an object that contains authCode, And now you can send The authCode over to the server using a Secure HTTPS connection On the server side use a client Library to exchange authCode with a credential object: Which includes access_token, request_token and id_token, The access_token Is a primary key to access the user data? Through Google APIs, The refresh_token is a key To renew the access token, An id_token represents The authenticated user, as I mentioned in A previous article Remember that the Client libraries take care of refreshing, the Access token, if it has expired, For this reason, you should Store the credential object in your database.
After each request, This ensures you always have The latest credential object Once you’ve got the Credentials you can make API calls by using The [ INAUDIBLE, ] APIs, client library, OK, So we have gone Through the steps we recommend in order to use Google sign-in effectively, If you have any Questions ask them at stackoverflow with A tag Google sign-in and we will do our Best to answer them, Thanks for stopping by, I hope you will enjoy coding.
A smoother sign-in experience for your users with Google sign-in [ MUSIC PLAYING ]
我叫 Eiji, 有个可以解决这种问题的简便方法, My name is Eiji and there’s a handy and simple solution: 叫做联合登陆 To this issue called federated login 联合登陆意味着用户 Federated login means that user authenticates 可以用第三方身份进行认证 Using a third party identity, usually 一般不用再输入证书或配置文件信息了 Without reentering credentials or profile information, Google 登陆是, Google 在联合登陆上的一次尝试 Google Sign In is Google’s take on federated login, 它可以让你尽可能简单的去实现 And is designed to be as easy as possible for you to implement 并且方便用户登陆 And for users to sign in 让我们看看它的工作原理 Let’s see how it works: 这是个登陆按钮 Here’s the sign in button 用户点击后, 出现一个登陆窗口, When the user taps on it, a sign in window appears 用户选择一个账户 The user chooses an account and then signs 如果还未登陆就进行登陆 In if he is not signed in already 用户允许访问配置文件信息 The user allows access to profile information, 现在弹出的窗口关闭了, 用户登录成功, Now the pop-up window closes and the user is signed in 要注意的是 当前应用请求用户权限的最好方法 Notice that the current best practice for asking permissions 是增加它的权限 Is incremental authorization 这意味着与其在登陆同时请求用户权限 This means that, rather than signing in and requesting user 你不如直接登录 Permissions at the same time, you should first 并且只在需要的时候 Sign your user in and request for permissions only when they 请求权限 Are needed, 想了解更多详细内容, 还请看我关于权限的视频, Check out my authorization article for further details on this 现在让我们看看如何轻松 Now, let’s take a look at how to implement Google 实现 Google 登陆 Sign-In in just a few steps: 首先 前往, Google, 开发者控制台 First, head over to Google Developers Console 创建一个工程 添加证书 Create a project add a credential 配置一个同意屏幕 再创建一个客户 ID Configure a consent screen and create a client ID 在, HTML 中 用 meta, 标签把客户 ID 添加到 head 当中, In HTML add the client ID to the head section using metatag 之后加载 api.
Js Then load api.Js 它是, Google, Javascript 库的核心 This is the core of Google JavaScript library, 加载完 api.Js 调用 gapi.Load 方法 When api.Js is loaded, call gapi.Load, 导入, auth2, 模块来启用, Google, 登陆 To import auth2 module to enable Google Sign-In 再调用 gpi.Auth2.Init 方法进行初始化 Then call gapi.Auth2.Init to initialize 一旦这些都完成了 你也就准备好了 Once these are done, you are ready, 下一步是生成一个登陆 button The next step is to render a sign in button 最常见的做法就是采用传统的 button.
The most generic option to do this is to use a custom button. 可以用标准 CSS, 在, HTML 标签中设计 button. Put an HTML tag and use regular CSS to design the button 别忘了看我们关于 button 的设计指南 Don’t forget to read our guidelines for designing the button 你还会在同一文档中发现 button 的资源文件 You also find the button assets in the same doc: 添加一个事件监听器 这样在点击 button 时就会进行登陆 Add an event listener and invoke sign-in when the button is pressed.
登陆功能会返回一个, Google, 用户对象 The sign-in function returns, a Google user object, 可以用它得到基本配置文件信息 例如姓名 Use it to get basic profile information such as username, 电子邮件, 以及用户头像, Email and the profile image 最终 用户调用, signOut 方法就可以登出了 Finally, users can sign out simply by calling signOut 了解更详细的工作过程 可以回顾我们的样例代码 Review our sample code here for a more detailed work through 好了 Ok.
这就是用 Google 登陆进行认证的基本内容 This was the basis of authentication using Google Sign-In 但是涉及到服务器时又该怎么做呢 But what do you do if there’s a server involved, 或者如何以用户身份访问 Google, API, Or how would you access the Google APIs on behalf of the user, 我会在接下来的 I will talk about these workflows, 系列视频中讲讲这些工作流程 In the following articles in this series, 感谢您的收看 我们下期再会 Thank you for stopping by and stay tuned [ MUSIC PLAYING ]
It’s good. Did you get a haircut? I did a haircut new accent, new new new. Look. You feel it’s good! It’s good you’re, looking better than before. You feel better than before. You’re, not mad. I am NOT no hi, I’m Rob Dodson, I’m a developer advocate on the chrome team, sure Rob just just sell, sell yourself. I mean hello and also uh you’re selling stuff, also host a little show on the chrome Developers.
Youtube blog called alley cast world-renown. Is that what we’re calling it yes well world renowned, I see people around the world have renowned it. I think, okay, all right, believe what you want to believe, but today we’re going to be talking about accessibility, audit, Angley right. What is your workflow for that? Look? Like yeah, so over here on, my laptop I’ve got a site that I’ve been working on.
This is called lifestyle. It’s got some cool like hipster photos and stuff, like that people have styles of the accessible and famous all right yeah, and what I usually do when I’m you know working on improving the accessibility of a site is, I will use the new audits panel in chrome, Dev tools, which is very very nice if you go to create a new audit, you’ll, see that you’ve got like a number of options inside of there, so you could look at PW, anus, best practices, etc.
One of the topic areas is accessibility, so you can just go run, just an accessibility audit. If you don’t, you don’t feel like doing the other tests. Here’s one that I ran against the page and it’s doing pretty. Okay right. It’s got on anyone not so bad, but there’s definitely a few issues that we need to fix and in particular one that I see a lot is, is color contrast, so you’ve got your your your foreground text.
Maybe is a little too light on the background. Color one of the nice things that we can do with the audits panel is we can actually dive in and we can see which elements specifically have failing contrast. So here I can see that I’ve got this like product card price element and if I click on that and stretch this out a little bit, you can see. It’ll take me over to my elements panel and I can actually scroll in to view the actual element that is failing just this price right, y’all, nice and it already selects the domnode for you, that’s cool, yeah, and so one of the things that’s really helpful.
Is you know really this is this? Allow me to sort of quickly identify this node, but one of the things we’re working on, which is over here in Chrome, Canary right now, is actually a color picker. That will make it a little bit easier for you to fix those contrast issues. So if you’re in something like Chrome Canary, you can go into Chrome, colon, slash, slash flags, you can look for the word: developer tools, experiments, oh you’re, in flags and experiments.
You look like to live dangerously, oh yeah, oh yeah, so dangerously, so we enable the developer tools, experiments right. We step into the future, it’ll refresh our browser for us. We can go back over here pop up in as the dev tools click on this little Settings. Menu good, where it says experiments da da and here we can see, we’ve got accessible the inspection as well as color contrast ratio line.
So let’s see what that does so we’ll go, find that same node. That was giving us problems over here. Inspect it and then we can see in our Styles panel I got a little color sread and click on that and you’ll see that there’s this little line inside of my color palettes. This is actually a sea mmmmm-hmm. This was actually telling us like. Where are our colors needs to be in order to have sufficient color contrast? So, since we’re above the line, we get this little warning that says, we’ve got a little contrast.
I happen to know that this is not like the final look for this piece of UI. It’s still being iterated on, but it’ll be something like this, where you’ve got a line and you can sort of tell which side is the good side of the bad side. So I can actually just drag this below the line. That warning goes away. You can see over here. It’s also like updating my element live in the document and it’ll sort of tell me what the good color contrast ratio is.
So I can just grab that value right off here and then go back and just fix it in my CSS. That’s pretty neat, so I was trying this out the other week and something that occurred to me was that you know if, if you use a developer, realize that the contrast is a little bit off, do you need to go back to your designers at that point, And say: well, is this okay for our brand and thing is that’s when they should be factored in earlier on in the process I ideal.
Yeah like this is there’s, there’s definitely other design tools out. There there’s, I think, there’s plug-ins for sketch, and things like that, which will also help you look at the color contrast for your designs and make sure things are not too low. Contrast, anytime, you can catch that earlier in the process, make sure all the designers are on board and all the stakeholders are on board and and that sort of like makes it easier when those things come downstream for folks to implement it, and it doesn’t kind of, Like a contentious issue or anything cool, that’s that’s awesome.
The house audit also had some other accessibility stuff in there as well right. So it had contrast. No, I was highlighting all the tributes to alt attributes, yep yep, so yeah. If we go back to that report, let’s see here so yeah a few of the things that that this site was failing. It’s missing some alt attributes. We’ve got form elements that don’t have associated labels: the big problem there is you land on a control, and maybe it says that it’s a button, but it doesn’t tell you what kind of button right is it the you know, sin my social security number to hackers Button, I don’t want to click that button right.
I want to make sure that I’m clicking the right kind of controls. I know what I’m interacting with we’ve got over. I think 32 tests, or maybe even over 35 tests in in the lighthouse accessibility checker here and under the hood. These tests are all based on a library called axe core which is made by some folks at a DQ so yeah. We we work at the axe, core library we leverage to the test from inside of it and we sort of integrated into dev tools.
You can hop around and inspect the notes. Real, quick, that’s awesome, so this is great again for locally checking on your accessibility issues. What about CI and continuously monitoring your accessibility? Is there a story for that too yeah? Absolutely so the the lighthouse library itself can be used as a standalone node module. So you can pull that into your CI process. If you want to do that or alternatively, you could use the axe core library that is powering these tests and you could use that standalone.
The the nice thing there is, you can sort of decide which accessibility tests you want to turn on or off, depending on sort of the criteria that you’re trying to meet very cool. So we’ve got lots of great tooling for accessibility, auditing. What about docks or education material? Yes, we have that as well. So if you go to developers.Google.Com/live Sunda mental, slash accessibility, we have a whole section there on getting started with accessibility for the web, and it also includes links to our Udacity course.
So that’s like a multi-week kind of hands-on experience where you actually like build stuff and read a bunch of articles and kind of get up to speed on accessibility, very cool yeah. I feel, like my lifestyle, is more accessible, already yeah cool yeah, thanks for having me today, yeah thanks for coming down awesome yeah people should check out ala cast: oh yeah, oh yeah,