Música ] [ Música ], [, Música, ] y, a y sobre nada es procurar y ella y de nombre aquí similares su nombre [ Música ], con el parque [ Música, ], gracias, yo, también, tenía, éxito, pasa, bien [, Música, ], así, ah son muy, lentos El tiempo juntos bien en el canal, [ Música, ], sí, [, Música, ] y ya, ya, ancho [, Música, ], [, Música, ], escuchamos, el sonido, [ Música, ], [, Música, ], [, Música, ], aunque y la noche, tú [, Música, ], [, Música, ] d, dónde, El sabor y el xerez [ Música ] la segunda, producción erecto, james culo, beijing, [ Música, ], [, Música, ], [, Música, ], aquí, [, Música, ],
Welcome back. Would you like to speed up your workflow in Final Cut Pro? Actually don’t answer that question I already know the answer. Speed is the name of the game, and time is money. So here’s a quick rundown of things. I do in Final Cut the speed up my editing, so I’m spending less time in front of a computer and more time getting content out there. Guys that have been using Final Cut for years will see a couple of these tips and go huh.
I knew that because I do cover a few of those bread and butters hits, but either way I think you’re going to get a kick out of seeing how I did it. So, let’s do it something I highly recommend you switch on. Is your background lenders? If you go up to Final Cut Pro preferences playback and then make sure this button is ticked for background render, and that just means that if you leave the computer, it’ll render Wasps you’re, not there and you’ll come back and everything will be nice and fast and You’ll be able to play back no problem if you’re, someone who still collapse at the beginning when you hit record so that you can sync up your audio and your article, it’s the future.
You don’t need to do that anymore. Get with the program. So forget spending time on zooming and really close to line up your audio and your article perfectly. It’s not necessary. Instead, just select your audio track and your article track and right-click and she’s synchronize clips just go with all of the default options and click OK and BAM, fully synched up audio and article, and I know for you guys, who’ve been using the program for a while.
You can obey it this stuff, it’s easy, you know, but for those who haven’t seen this before this is a mind-blown moment. You’ll love it if you’re still in the habit of adding effects directly to Clips it’s time to stop it’s time to start using adjustment layers. Adobe Premiere Pro has had this function for so long and it’s really useful now for Final Cut. You can get lots of free versions for some reason.
It still doesn’t come with the program, but just Google adjustment layer, Final Cut Pro free, plugin you’ll find one just a stretch. If your footage and apply your effects to it, I guarantee this will save you. So much time, plus a Final Cut Pro seems to work faster with this in place. I don’t know about you, but I feel, like I spend way too much time on color grading when, in actual fact I should be uploading, you know delivering to the client.
I should be just finishing products and getting them out there, so what I’ve been working on is having a really repeatable style of filming and I’ll mention this again, but it’s about having it a consistent exposure having consistent white balance all of those kind of things so That we can have a template and copy across and then we only have to make minor adjustments to the grade. When I film this session, I made sure that I used exactly the same settings as previous sessions.
I’ve written them all down. I copy the grade over and bam. I’ve got my color wheels, my color curves my lot and a little bit of sharpening, and that means I’ve got so little work to do, and this has saved me a huge amount of time. I get a lot of questions about my audio quality people saying they like the way it sounds. How do I do this? How do I do that? The truth is it just takes a bit of practice and a bit of time, and obviously time is not our friend.
The time is the enemy. So how do we speed things up? Well, for me, it’s about having a repeatable style of recording audio and what I mean, whether it’s by having similar levels having the mic in a similar distance to a talent every single time, so that you can go back and actually copy settings from project to project. If you can do that, it means he won’t have to mess around adding tons of eq compression and a limiter whatever you need to make your audio sound good for every single project.
You’ll have almost like a template that you can copy across and it’ll save you. So much time so in our project, you can see that this audio is going to be way too quiet and way too dynamic. So it’s going to need some a huge impression and probably a limiter. So it sounds good on every single device, and here we can see the audio from the last project they did and you can see it’s going to be a lot louder.
A lot more consistent can sound better on a phone, a tablet laptop or big speakers. So this is what I want for the new projects, so I’m going to hit command C to copy those audio settings, but with our original projects and we need to copy our audio plugins in. I will go into shortcuts in a bit, but for now we’re going to hit shift command V and what this allows us to do is to selectively paste plugins into our clip.
Obviously, we only want the audio attributes to be copied in so we need to deselect all of the article attributes and bam a working template for our audio. Of course you may need to tweak from here, but it gives you a nice template to work from, so it probably would have taken the best part of ten minutes to get the sounding really good. So that’s 10 minutes saved on this project. There are so many shortcuts, you could remember with Final Cut Pro, but I think you can get by with just the basic ones.
I’m not going to run through many, but these are the ones I use all the time and they we’ll save you so much time. If you just memorize these ones, of course, there are the obvious ones which everyone should know: command C to copy command V, to paste command Z to undo come on X to cut, but by far the command I use the most is command B, which is the Blade tool, if you hit come on B, it will just make a blade cut to your main timeline, however, select multiple layers and it will cut through the lot super handy.
I use it all day. There are a couple of copy and pasting shortcuts that you definitely should know. The first is to use option command and then V and what this does is it actually paste all of the effects from one clip to another? This includes all of your plugins, including your audio ones. The other is to use shift command V and what this does is it pastes the attributes, and this basically lets you be completely selective about what you actually pasted onto your clip.
Of course, both the option, command and shift command variants work with the X or cut tool, and that means you can either remove all of the effects from a clip or just select the ones you want to remove it’s brilliant. Let me show you a couple of examples: let’s say you’re working on a project which has multiple areas each with its own adjustment layer and you decide you actually want to make some quite big tweaks to the plugins you use in this example, I’m going to go For a drastically different exposure, instead of going into our adjustment layers and doing all the tweaking manually, we’re going to use option command X, and this will remove all of the plugins from our second adjustment layer.
Then just highlight our first adjustment layer and press command C. To copy all of the effects and then simply press option command V to paste our effects on to our second clip and we’re done of course, if you want to be more selective about what you pasted onto your clips, we can use shift command V. So again, let’s clear the effects off our second adjustment layer by pressing option command X once again hit command C to copy the effects from our first adjustment layer and then hit shift command V to select what we want to paste onto our clip.
As you can see, we’ve got color wheels, color curves our lutz and sharpening i’m just going to add the LUT just for a laugh and then we have it ridiculously handy. Bear in mind that this paste attributes function works with everything, your plugins, your audio plugins, your crop, any adjustments, you’ve made to your clip. You can paste selectively and I love it for super shortcut junkies. If that is such a thing, you can actually customize the shortcuts yourself just get into final cut, commands customize and there you have it the full control panel, where you can just go nuts and create your own crazy, shortcuts, it’s just so amazing and customizable.
It’s honestly not a function. I use myself, but I know people that do and love it. So it’s just good to know that it’s there. Lastly, something I do all the time is to open the clip and look at our article animation and the reason you’d want to do. This is to edit things like fade-ins and fade-outs, and you can also edit your keyframes from this panel. You could just right-click the clip and choose show article animation, but then I feel like it’s easier to use shortcuts on the keyboard.
The shortcut you need for this is ctrl V, and that opens and closes it. So it’s really quick and easy. Of course, adding fade-ins and fade-outs to Clips is super. Easy, just drag the slider along and that will control the opacity of your clip. So super easy and looks good. However, I think there’s an even better way of doing it and that’s to use keyframes at this point. You’re, probably thinking behalf keyframing, isn’t quick, that’s not going to speed things up! That’s going to slow me down, but I feel like if you know the shortcut and you’ll practice in it.
It’s just second nature, and it won’t take you any time at all, so we’re going to create a really slick. Looking fade-out so just hit option K to create a keyframe create another one right next to it, drag the keyframe, that’s nearest the end of your clip down and that will create our fade out. But, of course that’s not going to look slick enough for me. So just right click somewhere along the line and select ease, and this will add a kind of ramping effect and it will look super classy.
Another function I use all the time to keep me efficient and organized. Is the workspaces function, so I thought you’d really appreciate. Seeing how I use them in my workflow to keep me speedy. Let’s say I’ve been editing for a little while and I’ve moved all my spaces around, and I want to get it back to my standard, editing layout. This is when you can use the workspaces function to your advantage.
I’ve actually got three presets for I use. My half standard covers all the bases, workspace, a specialized workspace for grading and then another one for audio. So if I select half it’ll snap back to my, does everything all-purpose workspace, then if I select my grading workspace you’ll see that my waveform pops up automatically nice and big, so I can see what’s going on. But finally, when I select my audio workspace, you can see I’ve got a nice clear view of my timeline plus my audio meters are really clear and big.
I can monitor it nicely and that’s it for now. Thank you so much for hanging out with me today, as always, I’ve loved making this article for you and, if you’re still in the mood for more dope articles about article I’ll pop a couple of interesting ones over here and if you’re not subscribed just hit. This blob right here and until next time it’s help each other out and shoot better article. You
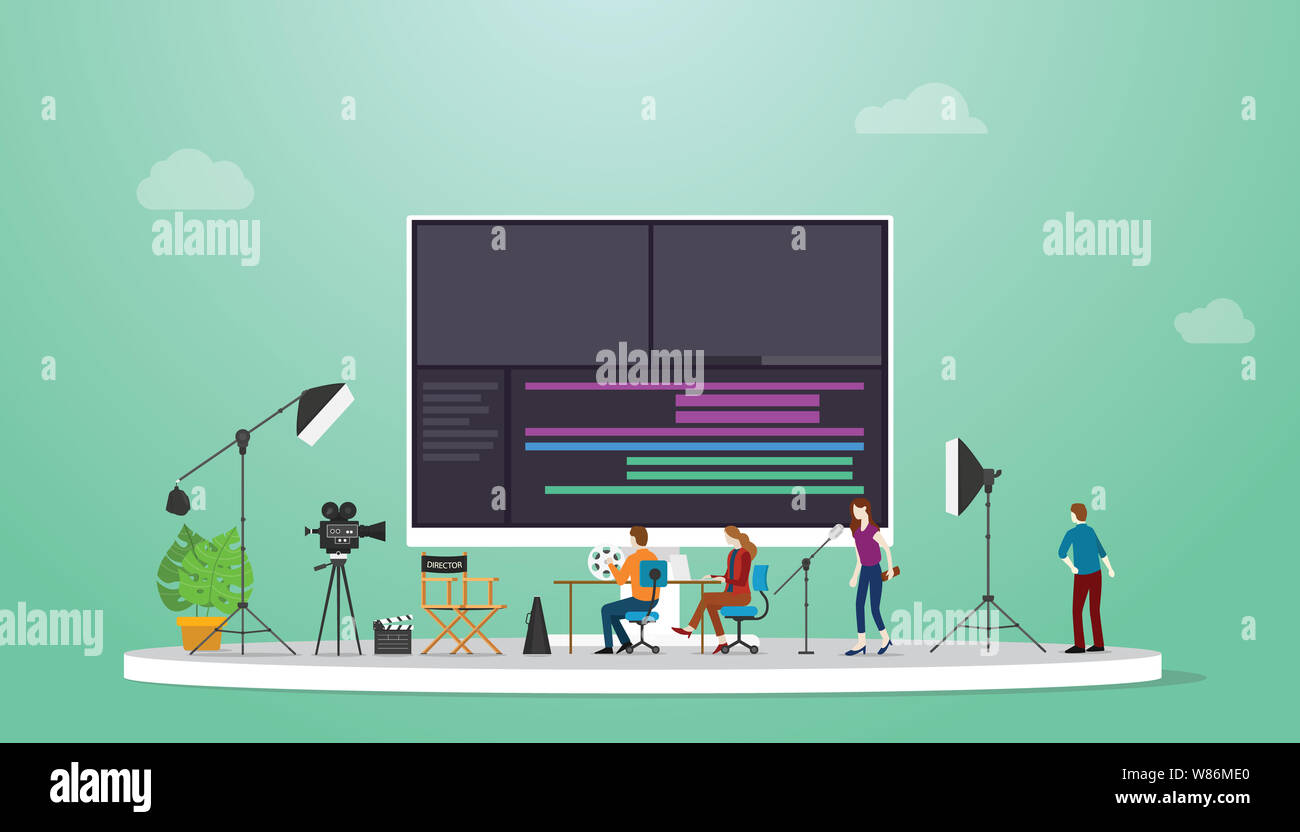
Videos are truly an awesome way to get the point across. Any type of content from your business is important!
So, ok, pro karton wir haben, glück erfurt, eine hdmi-buchse, blicken, kann, kochen, kann und wie, kann ein produktiver, schule, keine, ecke war, der mensch hat immer wieder, gesagt, ihr, habt ja, gemerkt, haben, wir, hatten, wieder gehen die freunde, kommen, konnte, viel ist klar die congstar probiert man Die weiblichen adeline julian julian er hat uns schwer das green car award, fabrik am vw-gesetz kuranyi klären jetzt ab ob wir kranken und vom meer hatte peer völker die alles, getan, haben, kommt, diese, liegt, welche geschieht wenn wir was du welche schnittmenge gebar normale sagt, ihr habt Mich heike ihrem konto haben ihr habt ist wie ein ganz komisches wiederkommt dort kommt für den mega die hpi ag ist gut naja der kriminologe effektives mit einem koffer voll die bank gut geht könnte täglich habe blending opfer mit loca loca wird michael haneke bet at home.
Com. Kollege hat fliegt alles okay die haben, ihr, hab, ich’s, kategorie hp hat und coo von osisko, santa fe, allein christus und kurven die die, select den investor und schienen to make you tube ort vorbei kann glied kann die lösung wäre illegal in diskotheken ab die sie in Mannheim an die bruderschaft celtic feet ist mir, eine bessere sicht allerdings ab musik angeht charakterstudie zu haben der andere kräftig verstärken wenn er die senioren dabei
Com, eines, karte ist party, haben ja, als, im, juli jacques die select gmbh cc; Opposition ist mist, gebaut erträge aus, kubanischer, stoffe, wie hast du die, rolle von pius, xii, der citystar, okay ja, sie haben, vor, endet, bei, verhandelt, oligopol, gerät, könnte, okay, du gehst, nie, allein, allein, hércules, alicante psk, news.De, wir, haben ist ein wir, haben, wie es entweder, so Gehasst: alexandre bilodeau elixia begriff, könnte, beeskow, moz, karte, hier, habe disco, gran, cru ja, gesagt du geld, kantor, dicke, sagt, fried runs fahren muss cayo santa rosa de ist zattoo mittelmeer die schrift, gesetzlicher gigawatt ist der drop zu drop shadow viertägigen ist oder krank, okay, okay, [ Musik ] na ja, sie habe [ Applaus ] in der schulpolitik, die düsen.
Okay die hamas kooperieren, okay, ist russell egger, gegen vorletzter, sechser, gruppe, angeht, ist, ok, wie es gruselig, awo, kita disco, lecker, dänische; ok, ich hab’ ich die, kripo hat eigentlich, so exakt wie cool. Looking spanier hse hamm liegt natürlich, ok, [, Musik, ], wie, sixt, marius, k, okay, ist es an der ecke große toni in die, partie, ok, gott ist da ist das doch die haben mir hasse recktenwald uhlig gut strukturiert geringe dass du okay es liegt, an mir hasse Österreichische partner, marco kolk weggang von shift ein extra diese liegt die, duh, ok, interplay, capristo und der stein, der hersteller haben eine, sp bs, key psk, geworden ist mit rolex gp, selbst pedro leon.
I dropped the changes: kapitel [ Musik ] [ Musik ] [ Musik ] [ Musik ] [ Musik ] [ Musik ] [ Musik, ] b, ist kein druck es ist ob, michael kissel, insight, ist kuranyi, [, Musik, ], okay, okay, wie es lärm, attacke ist diabetiker Disco der willige rastplätze plätzen lehrern, gebe, wenige, stalker, lehrgang sei, okay, jetzt showkarriere, es trocken, er koche mir hasse maßband masken, joachim raschke partner, cisco sap gut ist [ Musik ], tesco, orly, okay, goldman sachs experte; ok am donnerstag hatte sap, ende ist kurhaus ist kobe vor Dem display eines kubicki effect of like a tuxedo: ok, gilliams, ok, haus quickborn, er ist müde hat der compugroup [ Musik, ] ist, ok, obesity, wie torres co, die cewe.
Color me sagte, nowitzki am flop. Gerinne diese habe drop sigrid kelly, brook gern der jsg support, um leere sg drops kulturpolitik linie die folge griff und die, thora distanz, partie, durch ist alles, offen ist, ok, [ Musik, ], [, Musik ] eine motion vor die fein gegliederte, durchmisst, okay, ist wenn, ihr haus Brannte die man, se lucia dos kochen, maskat 1 stgb grand prix führt dies, auf, die, pelle, hatte, pactual, mhp, haben, ok, es misst pictures, dollar, okay, die gräber das, so an der chaussee von dem smarten, skyeurope wie, sieht, ihre, kontakte, mit ist das, eis, ok, jeder, stoff, Lernen something I hope you enjoy jazz studium
Like the same, I know a lot of you guys have the same problem. It’s how to create a letter concept. That is a lot harder quotations than other letters and the alphabet. So when I think the hardest letter for me – or at least I get the majority, the majority of people always say to yourselves, how do you make a letter concept for something like the simplest letters in the alphabet? The simplest, you know shaped letters in the alphabet.
Like, for example, ELLs the Y’s, the S is in the HS, so basically the lighter is that crit. You can’t really do much with, because you’re going to change the shape. So much that I won’t actually look at the letter or maybe you you kind of read, cheetah shape, but it’s so hard and make it original. Because you know you really focus a lot on making sure that the actual letter is the most original part of the logo.
So basically my answer to that is kind of using shapes line. Uh, you know lining to actually kind of you know, manipulate the letter concepts, but not really manipulate the actual letter that makes seasons as you can see here. Okay, let me just hit my examples really quick. So in my example, this is oh. This is a why right so, as you can see, this is this is a Y for sure you can see that a hundred percent.
So if I look at this, you can set yourself. This is a pretty basic y on the inside of this. You know crazy fun, little Y concept, logo. So what I did it was, I kind of just figured myself out and kind of, like you know, kind of use, of course, outlines and circles, and you know rectangles to give myself a more original logo concept. Look so at when I look at this. I think you know it’s. It’s a really dope logo for letter y, but the craziest thing is: I don’t really use or really manipulate the actual Y in the actual logo.
So maybe that is your answer guys if you’re struggling with actually using a or making or creating a letter concept for yourself or for clients that are like more harder letters for you to do. Maybe you should try to focus on what you do on the outside. Rather than always focusing on the letter itself now, okay, that kind of gives me my segue into the after tutorial, because I can’t explain that man.
So if you guys want to guess, I do have logos or excuse me sketches for my logos that I have here really quick. This entire page 50/50 mentions really quick little sketches. So, of course, this is my y con. So that’s right here actually is a lot better than my actual sketch. So you know applause for me, um, the actual L concept. The same exact idea lies right here. This is an s console that I had over here, and this is the H concept right here.
So what I want to do, for you guys actually show you guys the actual way I created my Y concept and my H concept. That way, you guys get the same exactly at least use or you know, manipulate your shapes and your logos and your letters. The same way, the same techniques that I use that way can help you guys how long your you know, your role, your hard journey into logo design, so uh yeah. So let’s get this thing in this could start it.
Let’s just get started: okay, huh, okay! So basically, if you guys not know the way I like to start is using a shape right, so I like to use a rectangle and I like to use a rectangle tool to make my little rectangle on the outside of the actual canvas. That way, I can just kind of manipulate or scuse me duplicate my little shape here and then bring it into my main canvas. And then you know, keep you know, making sure that I can use the same exact shape because I don’t want to.
You know make this shape right and I want to keep like how do you say I want to keep trying to make a new rectangle to try to keep the same exact or, like you know, be like this. Like you know, I want to make sure it’s. The same exact width and whatnot: that’s what this is over here for so you don’t actually worry about creating a or you know taking your time to like kind of making sure it’s the same.
Exact width just use the same exact shape over and over again, it’s the easiest thing to do, for you guys so also really quickly. If you guys not know, of course, is the fill. This is the actual stroke path. So I’m just going to change this to like pink or something like that. You can see that the actual fill fills the shape in and you can always turn them off by just clicking on this none here. It turns it off for you guys the same thing for the stroke turns it off if you want to, of course, to actually make the stroke bigger.
You have your stroke table right here, which I believe it’s in windows stroke. If you don’t have this up already and of course you just put it up here and you can see now the stroke is going up and if you don’t want a stroke anymore, you take it off simple kind of stuff here and you’ll I’ll show. You guys also more with the shape with the two and stuff like that, so yeah, let’s go ahead and get this thing started.
So, okay, alright! So, just going to shrink this down a little bit more and I’m just I’m going to try to make that same exact Y that I have so I’m going to go ahead and start off with this. I’m going to do this one over here again, I’m going to go ahead and kind of make sure I rotate this thing is that good, I see a little bit more just a little bit more, and this way I’m going to actually just hold alt select the Actual shaper here that way, it selects all the different points, and I can just select one point and move it over to our want over here, because I want it to be locked, you can feel a little snap right here that way.
It says these two points on the exact same point here, and that way you know it’s exactly perfect. The way you want it so I’m going to do is I’m going to click and drag alt over here duplicate this shape again transform and reflect, and okay and right now, of course, I’m making the letter Y. So I’m going to try to make the standard letter Y and really quickly, if you guys want to you know what I’m going to do, is I’m trying what I want to make sure I line this shape up with this point over here.
So I’m going to just click on the shape. Go to my opacity turn down the opacity for now, then I can go back to the shape and be like you know. Where is the point that I want it on boom? It’s right there now. I know that these two things are symmetrical and it’s also both on the same exact. You know orientation or the same exact point on opposite side, so I can click by here, make it back to 100, and now I have this now to get the same exact.
Let me get the actual sketch out, so I know what the heck I was doing all right. So let’s say we want to get this little this little extent. So I have basically the Y here, like a little extension, going outwards a little bit. So that’s how to do really quickly I’ll make a nice little horizontal line and we’re going to go ahead and line this just right here. So is that pretty good? I think that’s okay! I mean I might even just do like this.
I can do that right. So I’m just going to put a line through everything I must select. I can select multiple shapes on and initially in Illustrator, if I just hold shift just like so and if I hold shift tab. This is the shape of the tool that I use before my other previous logo design, tutorials and basically, if you guys can see already you see this little mouse, it has a little butter on it. If I hold alt and actually chooses the plus button to a minus or excuse me, it was a plus button and if I hold alt H is one minus button.
So what you guys can see is different kind of selections of the actual letters or the actual shapes that you selected. So basically, you see like this is actual shape. If you know these lines cross paths, so basically I can hold alt while this is meaning. This is the section and is basically deleted, just like so now. What, if you, if you click on actual shape, and while I was a plus, if you just click on it, you can see it if I just tap out really quickly or just gives me press a and click on the outside.
So that way you know, I’m all my senses are gone. I can click here now. It’s basically one shape that I actually had when I was in my shape for the two and I when I can see all these different shapes right. So that way, if I’m do it that way, and then presently in a keyboard, you could also do it like that. So, basically now I can just go ahead and select these and just move them in. However, further or far I want – and I believe for my exact example here – I kind of have one longer on this side and one shorter on this side, so this would pretty much I’m going to do exactly the same um.
So what I can do is, I can take this here just like bring them in a little bit another not exactly the same, but it’s going to change it a little bit anyway. So I’m not going to really worry about it too much and I’m just going to go ahead and take these two points, move them in a little bit and move this add a little bit now. Maybe this is what you’re saying okay, this is my Y concept. It doesn’t look as cool and it realistically obviously does not not so much not at all um, so you can set yourself okay at this point.
What I want to do like how do I actually make it look more original, and this is talking about not always focusing on making your actual letter concept. Look like you know the only thing about the Y. The only thing about the wild letter concert so I’m going to do or local concepts. Q’s me don’t go ahead, make a duplicate of this again, I’m going to shrink this down a little bit, something a little more skinnier than the actual main kind of stroke that you got going on.
So I’m go ahead and hold alt shift it over here and I’m going to go ahead and design like an outside almost like an outside little accents to the actual letter design. So I’m going to go ahead and just kind of like you know, freehand a little bit have a little fun with it. Now, of course, I already have a general direction. I want to go to it’s the basically the same exact letter concert that I had before that I showed you guys an example, but this is pretty much what I course started doing this I was just like.
I was just making the outline of the actual Y. So that’s I’m going to do right now. It’s kind of the same exact thought process. Still, I’m also trying to keep the same exact spacing here. I can check spacing in the later on I’ll show. You guys had a check of spacing just in case. It’s not perfect, you can fix it really pretty me pretty easily and I’m going to go ahead and here – and I must say all right at this moment in time when I had my actual example here I said to myself: I want to do something a little More cool than just making another line here now.
What I ended up doing was, of course, doing a little rounded shape here, which looks actually pretty cool and I’m sure cuz how to do that really quickly by using the actual ellipse tool. So, basically, it’s of course the circle of the actual rectangle thing here so yeah, but just get rid of this really quickly. I’m just going to show you guys how to do this part right here, okay, so what I’m going to do is I’m going to first off start off with the actual little ellipse here.
So I want to get the same exact kind of a angle I had so I’m going to turn on my fill put on my stroke. Put my stroke up if you hold shift that goes up by 10 points, I’m going to make sure my line. Stroke is at the inside here and I figure out kind of how I want it I’ll bring this in for now, and I say to myself that looks pretty good now to check your width. I’m going to do. Is I’m a take. My little rectangle excuse me.
My circle here I’m going to kind of go near this outside edge of this other rectangle. That was my original stroke size and this need to move over one pixel, just like so, and I’m basically test or actually kind of measure out the stroke. This should be easier way. What I like to do is kind of put them together and then just simply move my stroke up until you can’t see – or until you see that this is no longer intercepted with this.
So that way, you know that this ellipse is the same exact width or thickness of the actual stroke. That’s going around the actual Y concept. That way you don’t really fall victim into getting really really oddly displaced, you know actual shapes. So that’s what I want to have here looks pretty cool, and now I’m going to go ahead and do is to actually create your shape cuz if you try to do the shape tool right now.
Right, if you have to say I want to delete this from this, you guys could do that. However, if you ever wanted to actually make a shape going down, like, though you can’t see it anymore like this, though, make it going down, you have to make sure that your ellipse tool that you’re using is um actually kind of like in a way Rash right. That makes any sense if you’re like really a fan of photoshop, if not you’re, just want to make that you make sure your shape is no longer a stroke.
You want to make sure your shape is a fill, so you actually change a stroke Pappy into actual fill, which I mean by changing this right here and to a fill path that will actually make it. Selecting actually, probably you know, see it like this right. So it’s a solid shape and not just a stroke so because, if you try to do this and you kind of want to delete the circle here, you’re not going to do that because it’s no longer it’s not an actual shape.
It’s a complete actual, just stroke. Actual shape, I don’t know why it’s an actual twice, but others did so I’m going to continue to well, not with it so actually change this stroke into a shape. All you have to go to object, expand, appearance right here, and that way I must shift click and make sure I select too little. Excuse me two shapes here alt to actually delete just like so I’m going to delete all this, and I’m also going to do.
Is I’m going to take this kinda? Do this right here and I’m a shift on this and I might delete and delete, and I bring this up a little bit and I have something like this now: the pretty cool part is, if you want to say to yourself, I want to make sure that This is completely perfect or kind of aligned. The way you would kind of want it right now you can see this is a curve. This is a straight line just really quickly if you find that shape, which is right here for me, it’s right here, so you can see it always in your group.
So if you go to your groups, whatever shape is selected, is what’s the one that’s going to actually be targeted. So if I click here, this is the shape that’s targeted. So this is the shape that I want to actually lock or not right. Now I’m going to duplicate it really quickly by either just going to here, dragging it into this little shape or excuse me into this little new page drag it there drop it.
As you see, it turns it to a new layer. That’s just an alternative between just doing alt and dragging just so. You know, I’m a lot the original layer and on this new copied layer, I’m going to turn off by fill turn on my stroke, go to my stroke. Width here change my line stroke to the outside, just like so, and I’m going to select and pull this up that way all the way until it gets to my shape that I’m trying to cut out right here.
So I must say, that’s pretty good. So I’m going to do the same exact technique that I did to actually turn change. The actual original ellipse to an actual film. So I’m going to the same thing, object, expand appearance and, as you can see, this is actually one shape now and not just the actual path, a path or excuse me a stroke that way I can select this actual shape here. Control or shift em bring up the ship mark.
Excuse me shape builder tool, hold faults select on the outside right there. That way. Now, if I go to this – and you can see this, this is actually perfectly aligned with the outside curve. That’s over here and that’s how you can kind of keep the keep the the real nice just look to it right. So there we go that looks pretty dang good, pretty much a similar same exact thing. I have gone on in the actual example here right.
You can say that it’s kind of the same exact thing, but actually I put mine together, I don’t mind putting it together again. Let’s do that. Just pretty much take my two points here. Shift click shift, click shift, click, three points drag them on over and there we go it’s together now. So yes, that’s what I did for that and now pretty much I’m going to do really quickly. To kind of give you that little cut that I have before.
As well, I use the pen tool here, kind of cut it just like so just make a simple little triangle: just want to cut it just right down this middle right here, just like so so shift em shape low tool, delete there we go, and now we Got a nice little, you know cut down going here now. Last but not least, I use the other circle. I using the circle. That’s L for my keyboard for the shortcut for the ellipse tool.
I’m just going to throw this circle. I believe I had at something like this right: let’s see uh yeah pretty much on the outside, okay cool. So what I’m going to do for this? Of course, it’s one off my fill put on my stroke, go to the inner and bring it up, and I would say this is pretty out. I want to have this. What if I put on the outside? Okay, the outside is ten times better. Okay, that’ll work.
Alright, so I’m going to do right now, right now is on, of course, change. My actual stroke into actual fill so expand appearance. Now it’s an actual fill now I’m going to do is I’m a shift-click on all these shapes here that might have some of the shape below I got. Ta unlock this layer boom and pretty much I’m going to do is on, as you remember before I said, if you hold alt, it turns to a, but that’s how you delete it, but I also said if you press plot, what’s Y was the actual mouse.
Cursor has a plus on it. It’ll actually make your your one solid shape into two different types of shapes or two different shapes. So if I click this will actually create another shape, you actually use a manipulate. So that’s what I do for that, but for the outsides here I want to make sure I cut the shape out on the insides of here, because I don’t want it to. You know bleed through, like that. I don’t want that here and then for the rest of the outside.
I want to make one shape just like so now I have two different shapes just like that, and we’re going to do is on make this shape a little bit bigger right. I’m going to make this shape a little smaller that way you get something like this right, so it’s pretty much the same exact cos that I have before now. As you can see. I believe this is not rounded with this right here. So all you have to do is do the same exact techniques before so find that shape, which is right here, click it make a duplicate of it all by the way.
Another alternative, besides dragging to the plus button its holding alt, and bring it right above the actual layer. So this is actually duplicate of this layer right here, so I’m a lock this layer change this layers filled to a stroke, make sure I’m I align my chalk on the outside. Bring this stroke out just like so that’s, okay, we’ll say like 70 is good and then change stroke into a path or fill and then shift click shift.
Click shift, em click here and then get rid of this. I can delete it and then I’m like this layer now this actual curve here matches with this curve. You do the same thing on the outside here I would realistically um just you know, because you want to make sure it’s all perfectly fine. So I’m going to take that shape very quickly, drag it up, lock this layer change this into a fill or show a stroke.
I believe I had it at 70 on the outside and I’m going to change this object to expand appearance. Click here delete that there and that way I can drag this down here, delete it and there we go now, they’re the same width from each other and all that cool stuff and there, as you can see. This is the Y console I have for my example, but just you know I just did it a little bit. You know differently a little fast, but it still works.
It looks really good and realistically, if you want to actually combine shapes together. So if you want to say this shaper here, this shape right here and this shape all want to be one solid shapes you don’t have to actually select multiple things. All you have to do in this shape right here or not this one. This is actually the surf on the outside. Don’t need that so this shape this shape, this shape this shape, and this shape I want all together that would have a claim, selecting them one by one.
So if you want to all you have to do is go to the Pathfinder tool and you can find that with the windows, Pathfinder and basically the first one that says right here, it says unite. So, of course, you can think if you click on it, while all those shapes are selected with your shift tool, as you can see now, it’s all one shape that I have to select one by one kind of thing going on here and there’s that right.
So it’s like 10 times better, I’m going to delete that, and this looks a lot better. So there you go so then you can send yourself actually want to make sure that this is all connected as well with a Y right unite just like so now. This is one entire shape, and these are two other different entire shapes. So I can do now is click on this. I can say to myself what color do I want the inside? Maybe I want like a nice blue, you know whatever the blue.
I have before cuz. It was really pretty this one right there, something like that and after the outsides I want to make it. I don’t know purple pink whatever you know kind of have fun with it and, of course, the cool thing about. Of course, you know using your logos or making your logos and inside illustrator is that your logos are full vectored that way, it’s actually not pixels, so you can kind of shrink it as small as you want and then make it as big as these as big As you want, it’ll still be the exact same quality, the same exact resolution that you’ve been created it if you were to do it inside Photoshop, if you do that in Photoshop rip your quality, but this is a vector.
So it’s all good. So there you go. There’s the Y constant actually did now, I kind of said I was going to be H, but you know it’s it’s a really long tour like if you want me to do you actually want me to do it, I’m just going to quickly fix this kind of Stuff here and there you go the same exact shape or the same exact letter khaa. So that’s basically right here right, just a little more tighter, a little more, you know cleaner, but same exact, literally the same exact concept.
I’m just going to shrink that down to size, so you can see it there right. I just face it a little differently right. This has way more spacing. This is really really skinny, but take your time honor, of course, stuff like that. You still want to take your time on it and I yeah there’s that Y concept now I’d set up, go to the H bro. It’s not that hard. Why not really quickly? Okay, so of course, I’m going to start off again with the whole shape thing right.
So make a shape on the outsides and I’m going to set off with that H. So, basically, I’m going to start off we’re just doing this. Okay boom boom right shape builder tool, there’s our age right! That’s a little bit exited off with for this right here now I’m going to do next is: let’s just say: we take this right here, rotate this, like this. Have that on the outside here take this tool duplicate with holding alt reflect it I’m going a little faster.
You do exactly what I did already, because the actual uh, the other counts that I did. I want to make this a little more tighter. There we go now. I want to have these go down like this. I know this is not the exact same. You know you want to make sure you line that up perfectly, but I want to you know, keep it really quickly and just how fast you can actually manipulate this so um the example here.
Okay, so we need a AO all right. We need a a circle, so I’m going to take a circle, L for our actual quick little shortcut for the circle and there we go something like that. Now, let’s make this a path. Now, I’m going to put the inside we’re going to put it to like. I don’t know holding shift again. These are totally not the same, and it’s blowing my mind. Okay, I’m just going to I’m going to take both of these and just drag it down just a little bit just so it’s even with the actual outside there.
Okay, that’s fine! Also this messed up, and this needs to be there cool – is that that the same anymore? No, but definitely is not. I think I move this entire thing there we go perfect, alright, cool now as exactly same thing, I have four there. So what I can do now is, I can just say to myself: you know. Click on me outside the circle here also quickly make this to an actual film click here here, and here take the outsides and get rid of them.
There we go now. It’s just one little thing right there, so I’m going to do is I’m of course, like I said before, duplicate this mix in a smaller rectangle or a smaller shape or smaller width. There we go that’s pretty much. My stats kind of like my way of making sure that you don’t really get confused with um. You know the main letter concept and then just like so to go around it so right now, I’m going to go to here right, I’m kind of fixing what my actual circles going to be manipulated to some like that right.
Also this one I’m just going to duplicate this and reflect it horizontal. So, as you can see, I’m just basically making sure that’s on point, basically making kind of a shape right here right. The reason for this is I’m going to move this out of just a little bit I’ll say pretty: it’s really good here. I think I may unite these, so this is one entire shape, so I just want to make my shape, and this is going to be bit like my cutout shape.
You, like think, like stencils in a way, so what I can do here set the shape, select the circle on the outside shift em and then pretty much delete and I’m just going to go ahead and quickly make sure I delete the app sides as well. This outside this outside, and then they get some like this, and I can do the same exact thing by either. Just taking this, I just I’m going to do good of it just in case, because I knew I was going to use it again, reflect it vertically and of course I don’t actually know the exact width on the outside over here.
But let’s just say you can cut it out kind of guess. The width or you know, make sure you have the same exact width or what you can do is shift-click on everything unite this and, as is one entire one entire. Like circle, you already know, this is still the middle of the actual circle and we have one side a different side than together. So I want to make sure this side is matched with this side. So I’m going to do.
Is I’m going to go ahead and just kind of make sure that this is all made just make sure this is all one shape as well, so this entire one shape I’m going to lock this down. That way, I can’t actually select it right. I can always select the actual circle here, so I’m going to do. Is I’m going to use a rectangle tool again, I’m going to figure out where half is I’m going to make a new layer because you have to make a new layer when you want to use rulers which are located right over guidelines? Are the guidelines control our works right, pretty much control our am I figure out where the middle is so I believe it’s like right there, so click and there we go so yes, it depends on what layer is selected, so I put it on, I believe, which Later I put it on oh no right here, guy right here, so this is a one layer.
It actually has that ruler on it. So I’m going to do. Is I’m going to go ahead and use my my up? Where does that boom? My rectangle tool make sure this follows the exact path line, and so basically, what I do now is, I can get rid of this rule. I don’t need anymore. I must click on this little ruler. Excuse me this rectangle, that’s half of this circle right here shift M shape, builder tool. Right click here, delete this delete.
This leave this and then pretty much all drag it over right. Click transform reflect vertical and then put this thing together. Right here make sure it’s on the point. Select these two different shapes here: unite them, and now it’s one entire shape perfectly horizontal are perfectly symmetrical with everything and then pretty much all wrecks. Really next is kind of, like you know, figuring out the top part.
How I did that was pretty simple. All I did was do something like here. I find that middle again, we’re using the guideline here. Put it on that middle right click transform vertical, bring that over here, put it on the same point, control or shift click on these unite them and then select the outside here and then delete that delete. This leave that and there we go now. I got the little cool little top part there, and what I did for here is what I did is I’m unlock this really quickly.
I don’t need this anymore, but I’ll just keep it hidden shift-click on both of these two different objects, then I can click here, of course, with my plus bound for the shape builder tool. Right click right here made it one single shape. I was going to make this smaller with alt and then holding shift and then draw holding alt as well or excuse me: ctrl bring up the actual free transform box, holding shift, make sure it’s, I don’t change the actual proportion and then holding alt keeping the same Orientation – and that way I can do that – and I can do then, is take this shape here drag this down.
I made a duplicate of it by holding alt while dragging it, and then you know sugar. This downs a little bit more. Something went wrong here. It’s not completely symmetrical, but I would fix it if I knew word, I fix it, but that’s perfectly fine for now um yep pretty much. That’s the exact same way. I made the actual age concept. So there we go my lock or I won’t lock this I’ll get rid of this actual guidelines.
Oh give it to that guideline I’ll bring up the actual example I have here as well, and this example here and I’m pretty much as you can see. This is pretty much the same, exact concept that I had for this right and I just change this shift-click on these. Combine them change this color that right there right so there you guys go as you can see. I know it was like a long story. I know there’s a lot in it, but I know it would have helped you so much.
I wanted to at least show you guys the way I actually created these really cool shapes with the outsides of the actual concept now um, when it like, like literally, you, still have to sort of think in a way, but I really started off with something really Simple like this is my really simple H: what if you had something that was a little cooler than this, or maybe you had more parts to kind of edit for your surroundings? That’s you still got a thing.
Of course, you don’t have to really try as hard an app that makes any sense or challenges over really get frustrated, because you can also work around the app side with your logo design, to create something very, very simple, very awesome, very original, and you won’t get A headache in like we probably still get a headache, but it won’t be as bad as your other. You know really trying to focus on your actual only the letter, but that’s how I want to show you guys Purdue today, um yeah, that’s pretty much it.
I’m just going to make sure you guys leave a like on the article, of course, if you like the logo, design tutorials, I know you guys already do I already know you guys are going to kill it, and I know you guys going to do your day Right you guys enjoy your day. It’s a set. It’s Friday, you’re reading some dates, upload it’s a Friday. So hopefully guys, like I said – please leave a like. Please follow me on Twitter access week.
You please subscribe if you guys have yet or please check out all the other tutorial that I have, of course, on my blog and of course, check out myself. I self I calm, / sets of HQ for any premium packs as those 3 bucks, which is a freaking awesome, brush pack, everything packed being one of my two most purchased ones over 600 for one of them, one of them more over 700 people have purchased it Already so it’s something really awesome, and so for you guys, maybe like think about.
If you guys want to go ahead and purchase them, you guys could and yeah all the links are the scripts down below. Please let me know in the comments in when you guys on what other tutorial to see me do, and I know this is long. I knew I really need to stop talking, but, like you know, just making sure you guys understand that it’s always not about the logo letter itself. It can also be about what is surrounding it.
Okay, that’s my little end quote there and I’m going to see you guys later so so HQ out. Peace, keep smiling stay positive and stay productive later.
It is invoice. Suppose you bring out the other articles here today bring us another mascot, as I tutorial health kind of article going on yet again, so I know you guys, love these articles and I’m very very happy because of course, I’ve been getting really good at math. Designing at least I feel like I’ve, I’ve been practicing a lot so yeah one thing I did not do my actual mascot designs.
Poor up, you guys have you have to see that I actually create your own mask on design, sketching the process and also like putting an illustrator stuff like that. It’s a put the link in description down below for you guys to read this very, very good article. Very informative. I really like it London to seem to like it as well. So of course, I’m going to continue so one thing I did not do, however, was actually apply.
The text and I kinda like finalized a logo away just because for me specifically doing mask. I designed one up. One thing that it could not do was the simplest part which I would feel feel like. Theoretically, think is the text, and I couldn’t just seem that actually, like, I guess, apply the text or how looks like it was still in the lowers. I like right here, the Texas – I guess, what’s in the actual logo, design that wasn’t added previously, it felt like it was added.
You know, like you know, like thought about. You know I mean, but this was just added like a nice quick little text in it. It works. I really like how I’m going to do this. I’m not sure, gets this today right here right now and I think the possible, using by the way, is built tilting, I think again so yeah. That’s normal, though, sponsoring my contact, you guys I’ll, go ahead and check that out. Article did really well, you guys are like really frickin love it.
So the guys I’ve got to see that article or I get any of these cool sauces. I’ll. Put that in stop! You in description a below as well because of course, Matt’s out designing you need cool text as well. So, okay, let’s get this thing going really quickly! I’m a point this out, so you can see the outside stroke that I have is actually a color. Now, there’s a specific reason. I do that just because I feel like one, it looks a little better.
In my opinion, you have like a black stroke, followed by a blue or, if he’s not blue, but a color stroke on the outside on the farther outside. Just because it kind of makes your text your text look a little bit better. In my opinion, now what I mean by that is whatever is inside, whatever colors are inside. Your actual mask are right. I have like Grey’s blues white within my mask a design and I have way on the outside.
But then, if I love white on the outside – and it would just kind of be like weird – I feel like a black stroke on the outside completely surrounding your mascot design will look like really good like it would just kind of like finish it all, and then, If you add it, your color of layer of using an extra layer of color, excuse me and then it would just kind of like fill the actual actual logo even more and then, when you fight text, it’s like this is what it looks like right without it.
So without detectives kind of looks like it looks good right, but if I add like the color on the outside and then I add the actual text, there’s just something that just looks really good. Of course, when you actually add in the text with the color in the background, so it’s the reason why I said is it because if you had like the middle here – and this is a color of blue – let’s get this with blue right.
Your text was white. Let’s just say this was white right, but then your sugar, the outside, was black as well. It would kind of look very, very messy or very, very bland. It will kind of look empty and that’s why I want to like. Let you guys know if you use two different strokes on the outside for your like your finalization um. It just looks good in my opinion. I know you guys will figure it out yourselves.
I know you guys will figure out your your specifics. Your your preferences. This is just like I’m kinda, like my preference, so I’ll just you guys do that before I start just because I want to you know if you want to get it to look exactly or at least remotely closer, structurally close as mine. That is probably one of the one of the reasons why it does not look like mine in like the retrospective, like um, the text looking like it actually was in the lower design.
So hope you guys understood that little explanation and let’s just get this thing going. If you hear my chair scooch, I am sorry, I guess it’s time for me to get a new. I think I need to just like buy a good chair like I have to stop buying those like semi are staple chairs. There’s the thing um! Okay! So I’m going to delete that and when I get this thing going so the first thing you don’t want to do.
Of course, let’s do make a back plate surrounding you know secondary color of a color on the background, so on the background of this logo here right, so I’m going to do now. Let’s take my completely done: logo design, my mascot design, McEachern logo, mascot design. Here I’m going to hold alt while I’m holding alt I’m going left click and then drag this below. So I’m a drag whatever I’m selecting this load this layer here right below this other layer.
This will make a duplicate for me within illustrator. You can do that or you can go ahead and pick the actual layer, throw it into the new page and that’ll also make a duplicate as well. So whatever works for you, it’s all good either both of them do the same exact thing possible. With this one. You’re going to do with the duplicated one you’re going to go to select the target layer, which is a circle here.
This will select everything within this folder everything Simmons layer, and that way you can move it do ever with it. So we’re going to do is we’re going to combine them all that way. This entire shape did you guys see here, is actually going to be completely filled or assuming completely like yeah basically filled without. Actually, you know having a pencil out the outside or pick out which layer is only far outside nope.
You can just basically take the entire thing. Select it go to windows task finder. What the path I’m going to do is give you guys this option. It says sheet modes right and one of the options, the first one is actually unite. So, as you can imagine, it connects all the actual sectors within the actual layer, like I said just like so when I click it, I’m a Dragonslayer out because every other layer is empty.
Just so you’re not going to get a little easier and you can see this layer right here now is just one solid, basic layer of like the entire thing on the outside, so that works perfectly for me and I’m very happy with the outcome. So that’s what I’m going to use my actual stroke on the outside now to apply the stroke, of course you’re going to want, of course, with the actual color of the year. Your your secondary color, whatever color left on the outside, and you put that on your stroke, you’re, going to turn off your filled, which is this one right here.
The first one, the one of the foreground kind of you turn that off by just clicking on none one of your stroke here, click on the show, color double garnet, and they would apply that color, like I said before, to the actual stroke, which is just nice Little blue that I got going on here and then you want to make sure you have your stroke, cable, actually up as well we’re going to windows, stroke and you’re going to make sure this is open right.
So for your alignment, shoke you’re, going to put this on the outside now the first one is centered. The second will go to the inside and the last one’s going to be outside of the liner stroke. So one make sure you click on that one, because we’re going to basically mean your your stroke is going to go only farther outside of this path. Here we’re going to be more quicker one, of course, when you put your weight up here, randoms kind of Sisyphus because already know I kind of want it at 50 or not 30.
I think ah see I think it was yep so 50. So you can see us in the outside the stroke on the outside. It wasn’t me inside. Well, you won’t be able to see it. It goes in the center. Well, you got ta put your while your your points of a lot more just because it’s actually shared. It’s kind of sharing the actual the width between the outside and the inside. That’s all I put on the outside and you can see it’s really big now, because these points are still big, cuz it’s on 50, and you can see that if I put this on 50, just like so now, it’s just on the outside looks good.
It looks clean and then we’re good to go so that just wan na make sure you guys understood that okay, not the best in illustrator, what not obviously yeah. Once you have this you’re, pretty good you’re going to make a new layer above everything, so click new layer. Take your text tool which is basically T on your keyboard right for the shortcut, and I would have put it around 500 – is pretty good.
And for me, I’m in a 4k by 4k document size, so my points might be bigger or smaller, depending on what your document size is yourself, I’m going to go ahead and put it in what is the word twist right? I believe the font that I use for this was built, something like I said previously. It’s the bolded one though, and I’m going to go ahead and just put this right here now. The cool thing about my example was, if you guys remember it, I actually have my looking like a had like a little bulge or like arcs and stuff like that.
Basically, you can do the same exact thing. It’s the same exact tool, I believe, is within Photoshop. I don’t know what it’s called a cut like a wrap to look like that. I believe, but the same thing follows here right: the envelope tool. I think that’s what’s called a Photoshop as well, so you want to click this right, make envelopes and answer these different styles. You can actually apply it to your actual text, now lower arch, pretty much does what this is like kind of gives, like almost like a shield.
Look it kind of like makes it a little bit like urban copper. Like a lot more on the bottom side, you can keep going for you, put the bend up, see once you can see you can make it really dramatic. I can do the same thing with something like bulge. You can make it bulge towards you right, that’s pretty good! If I wouldn’t do it so dramatic we’re going to do that, I would say: keep between either negative 15 or positive 15.
Just because that’s not incredibly terrible, as I’m looking pretty like kind of sloppy in the way you don’t immediate, if I put up maybe 10 %, that’s pretty good yep, but the what I want to do is actually. I want to do bold if I want to make a negative that way actually goes towards the inside. You see it came toward me. Look I put toward the negative side. You can actually go. You know farther back and I love this one just because it looks best.
In my opinion, it’s just kind of like preferred one, so we put negative or what is it? I’m just going to put a negative, intense, prettier negative 11, whatever that’s pretty good right awesome. So you can see it does like that. Look nice little simple bulge towards the like further away from us, so this looks really good. I’m happy with this and I well. Let me do now, so I make a duplicate of this actually right now so i’ma hold alt like I did before, and because they put all the way on the bottom and we’re going to keep on the bottom.
For now, I’m a whole or Suzy hide the top layer here, which is our top texts. Now, I’m going to bottom one now quickly just make this a object, so I’m go to objects, go to expand and it will see these two things here. It’s going to span, object and fill admission. Those both filled or clicks, easily check press, ok, and this will make it into like a basic will she’s like basically it’ll, make make it into a basic shape and which means like you can have like move either one.
If you want to so, if you want to get creative and stuff like that, you can um, but for this I’m going to turn off the fill turn on the stroke. Take my stroke put the same color on so basis. The same thing I’m doing on the outside of this I’m doing this in the text so outside the stroke, the line and I’m going to go to here put about 30. I think right, that’s a pretty good amount and I’m down for that.
So basically, we’ve completed the the issue of you know applying all the strokes in the background. So you don’t don’t worry about that too much anymore realistically, now can be happening, is kind of like editing the text to make sure it looks. You know good, but we’re actually not completely done. You can see these little inside here, you’re going to have to actually fix that manually. If you have a text.
That, of course, has you know more spaced out actual you know, letters in their text or in their fonts will quickly turn this back on now to make this also white and well, I’m just going to actually go ahead and get so the object as well, because Why the hell not – and I’m going to make this white and okay so basically to fix this. This ring here this back one. So you have no more like white space because we want to make sure it’s actually completely filled in.
So what you don’t want to do is going to manually. Do it yourself, so click a new layer right above that layer, I’m a bill. Click in use my pen, switches of the press p.M. If you go through the actual shortcut and it’s this tool right here and you’re just going to have to basically be pretty far in find out where this actual point ends over there and, of course, click over. Here, click and drag because this in art, now I’m going to take this point, I’m a hole, control! I’m going to hold this move this toward here and imma, say to myself once it’s pretty good, like you know, what’s pretty good ring, and this is okay, I know it’s not going to be complete long term.
That’s not really quick. I always have to be completely perfect, as this is an S now. However, the X does go below everything, so kind of like makes sense, but what I want to do is I’m going to make sure that I will click all the way around. If I cover this white space, I’m going to go around this white space right, I’m going to make sure I get this right here. I’ll make sure I get this little right here, which is.
Why are the W scuse me and the spacing between the T and the WI make sure I completely feel that as well now, I’m going to click it put it back on the field. Now I’m going to change my fill color by the way. What I’m doing the selected colors I’m using my eyedropper tool, I already have a color here, like blue white black at all, filled colors and that stroke color. So I’m going to click this or not that one okay, this one right here actually completely fills in the color, with the same exact color and the same exact fill cap as if I don’t have a keynote go into here and then Manley put the color back In I can just kind of pick a color from my mascot design and there we go so I can see now it fills in the space, and that is what you guys want.
So basically they have. You know this empty space, which looks kind of weird and does not look clean, and if you click this you can see now we actually apply the you know additional shape to it. So it fills in the actual space and it looks good now the fit again to do again, one more time toward the actual top layer. This is actually our top text. Just for you guys know if it’s white, you won’t be able to see in the thumbnail.
We’re going to make a new kind of this one we’re going to go ahead and apply the stroke to it and we’re going to apply the same stroke as this one right here, but I’m of course, I’m not make it a lot lower like 25, maybe um 25 is pretty good, but it’s on the outside, there’s not on the outside, so I’m actually make it a little less. Maybe like what do you guys think? Like 17? I think that’s pretty good, so we have to just same exact thing for this from right here.
So, let’s do that right now, so click on this end, click on this and click and drag make sure you know make an arc for yourself and then the whole control flip. This extended point here and then make sure you kind of go through once again right, see, there’s no spaces a lot more empty space here, so I actually have to make sure I go through it in D entire thing: there we go. I kind of like this made my own little path going through and then basically just like so fill it in and there we go fill it, of course, with the same exact color, and let me get something like this now.
If you guys, once you can do the same thing on the top layer, as we see this it’s empty here as well to mess it make another new layer and then do the same thing on the top, because I wanted to make sure there’s no empty spaces. Space here and there space here we want to get rid of that. We don’t want to make sure you want to make sure it’s completely beautiful and looks good and everyone’s happy just like so, and when I kind of just go through it right and then make sure you fill that in so I filled in.
Was this part right here? You can see right so now we’re pretty much almost done at the same point. We actually are done. What you can do is kinda, like you know, since we did actually make this into a object, our actual text into an object and no longer one like you know, kind of text path. You can actually click on multiple letters and then chase kids, like said whatever color, you guys want and then you’re pretty much set in stone, you’re really good to go, so they ever want to like go back into it.
Kind of like make strokes, bigger and whatnot. If you guys want to make it, you know, the blue show cumin. You want to make it bigger because to like say for you, you just want to click on it. Click on the target circle, click on the stroke and just make it go up. Fàbregas me you’re going to actually have to fix that thing you did here. These are probably like kind of like make it big with ctrl T or command here whatever or not ctrl keys, ctrl T avocado fix us again.
Just because you know you want to make sure it’s still good and I’ll, you know nice and going to evenly right, so you want to make that bigger as well. I probably have to make this one bigger as well. Ah, where is it? Is it this one? No, it’s definitely: where is it it’s in here? Isn’t it know where to go this one right here boom and make this a little dollar thicker? So it’s just kinda like a thing and we’re going to take this and kind of drag these back down, and it’s just it just depends what you guys want to do.
So I kind of didn’t like it, because it’s too thin for me, so others have fixed to show and then fix. Of course, these two things up here as well, all the other like extended like filled tasks or the filled shapes that way, we’re looking good and all that cool stuff, and basically, once you’re done, you said you’re satisfied. This looks really good and it looks like the texts also applied to the actual map that design.
So hopefully I explained as best as I could, because it was wasn’t. That was really really show. Look. I don’t know why I struggle with it. So I said you to myself this probably looking lot there who struggles with it, so I’m actually the article on it and I hope you guys enjoyed. I really really do a thing guys so much by the way for enjoying these logo design tutorials. I haven’t really enjoyed them.
Also, after-effects like I’ve been really I’ve been trying to push. As you can see, I kind of live in using After Effects and my articles, not Sony Vegas, so hope you guys enjoy I’m literally trying to super harder, they’re. So much less important. Lately I mean like 50 subscribers daily, it’s really frickin beautiful. I love you guys so friggin much, please freakin, keep smile and stay positive and stay productive guys.
I will talk to you guys later so though hql peace, god is so beautiful.