Se obrací na sociální sítě jako, je Instagram Facebook YouTube aby, začali cestovat, My jsme ale, začali cestovat bez použití, jediného z, těchto online nástrojů, Můžeš být normální osoba nikoliv hvězda na socální síti, a vydělávat peníze na cestách Když jsem opustila, domov, tak, jsem, začala cestovat na plný; Úvazek ale za cenu pracování 24/7 Vedla jsem tůry v, Africe a byla to úžasná zkušenost Všechny moje výdaje byly pokryty, a měla jsem možnost vidět, hodně z, tohoto kontinentu, Byla to úžasná příležitost ale, měla, jsem, daleko, méně, svobody, než, jako, digitální, nomád, Laďa, přistoupil k, příjmu a Cestování naprosto jinak On cíleně vyhledával, práce, v, různých odvětvích v, zahraničí, o kterých se chtěl víc naučit, a takhle se vystavil velkému množství řemesel, a komunit Rotoval práci, a cestování což není ideální protože jsi pořád, uvězněný v, práci aby, sis, pokryl, další, výlet, Jak, si tohle uvědomil; Tak začal pracovat na online videjích, o všem spojeném s, focením Jako, Photoshop retušování, a následně, je začal prodávat na jeho webu Tohle, mu, dalo, daleko, větší, svobodu, cestovat, Jakmile jsme se rozhodli žít, spolu, život, v, dodávce pro nás byl nejlepší kompromis, pro levné snadné, a mezinárodní cestování Dále se soustředíme na práce které můžeme, dělat z, našich laptopů, My aktuálně žijeme, a cestujeme v naší vyrobené dodávce takže naše životní náklady jako, páru, jsou, někde, okolo $ 1200 USD Život v, dodávce umožňuje snadný, a praktický způsob cestování, Plus můžeme zůstat komfortní produktivní, a udržet náklady Nízko Pro pokrytí našich nákladů na cestách, pracuji 15 hodin týdně vyučováním angličtiny na internetu Mám placeno zhruba $ 22 na hodinu, a firma pro kterou pracuji se jmenuje GoGoKid studenti jsou z, Číny, a my article, chatujeme přes online systém firmy Tahle práce mi umožňuje tvořit, si svůj Vlastní rozvrh což, je zásadní když cestujeme Takže jak to funguje že si buď mám několik dní volna, a nebo si vezmu víc hodin jestliže chci mít větší výplatu Pro přístup na internet si kupuji lokální sim karty, a naplním je daty, Je to překvapivě velice levné když, si Kupuji turistické balíčky Vytvořím si v telefonu hotspot přímo do laptopu a použiju, auto jako pojízdnou kancelář Připojení, je dostatečně silné s 4G nebo LTE abych mohla mít, tyto, konverzace, živě, Je to opravdu ideální mít, možnost, být, v, pohybu zaparkovat pracovat, a pokračovat v, našem týdnu Kvalifikovat.
Se pro tuto práci musíš být, buď z, Kanady, nebo, USA, Musíš taky, mít 4 roky na vysoké škole Nemusí to být pedagogická ale, zkušenost, je pro ně důležitá takže tě ocení vyšší hodinovou mzdou Pohovor, je docela rychlý, a dostaneš všechny podklady potřebné pro výuku Pro mě tohle Není cílová práce ale, spíše, přechodná, Rozhodně, je ale, velkým požehnáním, a pokrývá nám náklady už delší dobu Pracuji pro GoGoKid už asi rok, a jeden z, nejlepších aspektů, je neuvěřitelný kompromis života, a práce Umožnila nám mít tato cestovní dobrodružství, a hodně času na relaxaci, a cenu obětování Pouze 15 hodin týdně práci Jestli máš zájem pracovat pro GoGoKid nebo se, o tom více dozvědět napiš mi zprávu na Instagram @ curlyhaircamping, a já ti dám všechny informace, o kterých vím včetně celého přehledu, o průběhu pohovoru Nechám, můj, kód, můj, referenční, kód, dole v, popisu videa, Včetně referenčního odkazu Vždy preferují lidi na pohovory kteří byli doporučeni Teď, když, máme, hlavní, náklady pokryty se můžeme věnovat odvětví, pro které máme, největší vášeň, Pro nás to vždy bylo focení videa, a vzdělávání Tenhle životní styl nás určitě inspiroval, a motivoval, a my ho chceme sdílet s.
Kýmkoliv chdo, je ochotný poslouchat Jsme na cestách už roky, a proto cítíme že máme určitou znalost se kterou můžeme přispět k online komunitě, Nedávno jsme zjistili že YouTube, může, být super zdroj příjmu pro kohokoliv koho baví tvorba videa, Ať, už, natáčíme, vzdělávací, videa, o cestování na plný; Úvazek DIY projektech nebo informativním blogu YouTube, je dobrá platforma pro kterou rádi pracujeme.
My si na YouTube nevyděláváme na živobytí ale rozhodně to je krásná pomoc takže prosím nepřeskakujte reklamy na našem kanálu odměňuje nás to za dobře provedenou práci Dlouhodobé cestování bude pouze fungovat jestli si to budeš přát, Je nepřeberné množství možností jak online; tak, v, zahraničí a není to Pouze digitální marketing, Ať už pracuješ pro sebe ostatní nebo od obou trochu buď kreativní, a uvidíš svět v, krátké době Moc díky za sledování Jestli máš zájem, zjistit, kde, právě parkujeme, a něco více, o životě v, dodávce ujisti se že mě budeš sledovat na Instagramu, pod jménem, Curlyhaircamping Jestli chceš vidět zákulicí videí jako, je tohle focení, a elektrických kolech; tak sleduj Laďu jako Panorama_mann Jestli, máš, navíc, nějaký extra čas, tak mrkni na nějaká další videa na našem kanálu Díky, moc, za, sledování, uvidíme, se, v, dalším, videu,
Música ] [ Música ], [, Música, ] y, a y sobre nada es procurar y ella y de nombre aquí similares su nombre [ Música ], con el parque [ Música, ], gracias, yo, también, tenía, éxito, pasa, bien [, Música, ], así, ah son muy, lentos El tiempo juntos bien en el canal, [ Música, ], sí, [, Música, ] y ya, ya, ancho [, Música, ], [, Música, ], escuchamos, el sonido, [ Música, ], [, Música, ], [, Música, ], aunque y la noche, tú [, Música, ], [, Música, ] d, dónde, El sabor y el xerez [ Música ] la segunda, producción erecto, james culo, beijing, [ Música, ], [, Música, ], [, Música, ], aquí, [, Música, ],
I work on. These are Destined to be gifts eventually, I wanted them to all be similar because they’re Going to be for family members, I wanted them to have the same look to them, but I Also wanted to have a little bit of differentiation between them.
So I’m going to make the majority of the handles out of this curly maple and then I’ll be adding exotic hardwood segments, I cut them all to length and then I am Putting a diagonal cut in there, so I can insert the hardwood. I marked them so They would all be in a similar spot, but it’s really not critical of these are Exact because it’s not a set, I just wanted them to look similar. The accent Pieces are going to be red heart wenge, black palm and Osage orange.
I took Those pieces over to the belt sander since I cut them on the table, saw they Weren’t completely flat on that one edge I was holding in my hands. There’s a Little bit of movement – and I wanted this joint to be very tight because you’ll be Able to see in the finish scale pretty easily if there’s any gaps since they’re Such thin pieces also just for the glue bond. I wanted that strength. There Making a laminate out of some veneers – and this is going to serve a couple of Different purposes, the first is purely aesthetic I like to have a little bit of Pinstripe between the species of wood, also, since these are going to be Multiple pieces, I wanted to have something tying them together on the Back between the handle and the top of the scale, the way I oriented the grains Of this, wood is going to give them some extra strength, so there are ninety Degrees to each other, then that glued onto the back of the maple and the other Woods and there’s going to give more stability, while I’m working with it and Then hopefully, when it’s ultimately on the knife, it will too I slipped that Plastic wrap in there so that the pieces of veneer don’t stick to each other.
When the glue bleeds through when they’re clamped, while those are drying, I Turned my attention over to the pins that are going to go through the scales, I’m Using brass tube and I’m making a mosaic pin for these they’re going to be 4 Knives, so I’m cutting four sections of this brass tube. The way I make them, I Have to make them relatively short, because the epoxy won’t squirt reliably All the way, through, even with this length, there was a few little gaps.
I had to fill in after the pins were done for this. I’m Using TIG welding wire with the size of the brass tubes, these happen to Fit perfectly in there with three: it was a tight fit, so they weren’t going to wiggle Off center, when I started gluing them up, and it’s also going to have a nice Contrast between the black epoxy, the yellowish brass and then that White steel, With everything cut to size, I could start mixing up the epoxy.
This Is a five minute epoxy and get it at any hardware store the pigment I always use. Is it’s cheap? It’s readily available. You get it off. Ebay, they’re little baggies! Of pearl powder, like you, would add, to automotive paint, I use a syringe and Take the needle off and then you basically get some of that on the little Pieces of TIG wire and then you can squirt it in through both ends and when It starts coming out the other end.
You know that you’ve kind of pushed all the Air out of the system, the other thing I’ve heard of people using for the dye Is just Rit dye powder? It’s like a fabric dye have a try to myself, but Anything the colors, the epoxy, should work coming back to the scales you can See that those veneers that I had I cut up into small pieces, this I’m putting in Between the parts in between the hardwoods and the curly maple, I use Contrasting woods for those sheets of veneer, so you’ll kind of get a two Pinstripe effect and then I put the lighter parts into the darker wood in The darker parts out next to the maple, so to really pop a little bit more.
I put The pieces of wood on both sides of the veneer that way I could get more even Pressure and really get clamped on there well, when those had dried for a little Bit it was time to glue them into the the maple. I did this in two steps: Whenever you start getting these angles in there, it makes gluing them up a Little bit tricky, you can’t put a whole lot of pressure on them. Otherwise, They’ll tend to slide off, so it’s kind of a balance between getting just enough So that they stick together and not enough, so the glue joints weak, you can Get them to just stick together with the pressure of the glue, but I noticed some Of the ones I did that on especially on the second part, I couldn’t Get them to not slide, there’s a couple that kind of delaminated a little bit That I had to glue back together when I cut him in half and I’m wondering if Those weren’t, the ones that I didn’t clamp the other kind of funny thing that Those angles did was to the eye.
It was hard to make sure that the two pieces of The maple are parallel if they didn’t slide off relative to each other and Since these weren’t a whole lot wider than what I needed them to be in the Final product, I did need them to be pretty spot-on on there. I started Clamping them together and then sticking them on that flat piece. Of wood that way, I just maintained that as much thickness As I could to we get us work, it was some relatively tight tolerances.
I had Some extra to play with, but not a whole lot for a lot of things. I’m a Harbor Freight fanboy, but I would not buy a cordless drill from them. The batteries do Not hold a charge overnight. What I’m trying to do here is the pins had a Little bit of epoxy on the outside, just for me handling them. I needed to Get them back down to round and back down to the size they were before so They fit into the holes in the knives, so I’m taking it and just Chucking it up in the drill and running some sandpaper over it.
At this point, the Final dimensions are starting to get dialed in on the knife scale, so I am Making a template on the knife blank and it was really important where those Holes fell in relation to that diagonal stripe if they weren’t centered on it or If they were off, I thought it would really look funny in the final knife. So I was taking a lot of care to position those exactly where I wanted them and Then I’m trimming off the top part of the blank there on the table saw before I put the veneer backing on these.
I wanted to make sure that they were Really straight after that last cut, so I’m going back on there. I marked over With some pencil and then I can set them on their flat and whenever all the Pencil marks are gone. I know that I’ve hit all the regions that they’re all Level, for that part, that’s going to hit up against the knife. This was one of Those design changes that made it a little bit harder, but I think it was Worth in the finished product, the hard wood caps I’m putting on here, I would Have done it while the two sides were together, But I didn’t really know until I saw it with just the maple all the way up.
The Night, if I didn’t didn’t really like it, so I came back and trimmed them and put The caps on so at this point I’ve gone back and I have ground them flat on the Back a final time, this veneer is actually the second time I had to do. That I had some adhesion problems with the first one, where I didn’t get quite Enough glue in the joints, so the pieces of veneer were separating anyway. It went Back, I got those corrected and I’m using this tape.
In-Between and again, it’s just The same reason I used that plastic wrap the first time was that way, these aren’t Going to stick together, the veneer is thin enough that if you put enough glue In the joint it will bleed through and just that enough, that bleed through is Going to make it really hard to get them unstuck, after that, it was just a matter. Of letting them dry it till the next step here, I’m making a final set of tape.
Templates since the scales are at this point basically finished other than Their final shaping I’m doing a little bit different. This time. I thought I Would save some time by getting these scales to the exact right size before I Glued them on the knives. I thought this was going to save me some time, because when You put them on the knife and then shape them. You never to get scuffs on the Spine of the knife that you have to polish out trying to avoid that.
I think I took one step forward and two steps back, because I ended up having to shape Them anyway, I just couldn’t give them lined up exactly properly when you shape Them on the knife: it takes away all of the wood right down to the steel, a Little bit the steel too, but it makes that fit really precise. At this point, it’s Time to attach them on to the knife and start making the holes for the pins to Go through I’m using just regular Brad point wood drill bit, but I’m making sure That it’s pressed up tightly against the backing plate because I’ve had a lot of Instances where I’m coming and the scales are basically completely done.
And then I bust, through them, with the drill Bit and blow out a bunch of grain on the back, so you really don’t want that to Happen so I’m taking all the precautions I can against it after I have the one Side done, I flip it over position it and then I’m putting the pins all the way. Through that way, they’re going to be in their final And this is another thing where, if I shaped them, when they’re already on the Knife I can just glue one side down and drill through and then glue the other Side down the pins go right in, I don’t have to mess with having them in there.
Anyway, so I put the pins through and then I’m marking around the edge Figuring out where I want the top of that to be, and I’m going to take it over To the belt sander to get those exactly where they need to be, since there was Quite a bit of that extra hardwood on the very top I didn’t use the belt Sander to get the tops, even I came and used a handsaw just to get the Majority of the material cut off so I could shape them, so it was kind of Interesting and doing four of these at the same time, usually I don’t do any production runs of anything, so I’m always just doing a one-off and it’s Just kind of a fun creative thing, but when you start doing the same thing and Even just four times over, you start seeing the little tricks and you just do.
Each one a little bit better and you can really progress with your skills on on Whatever you’re doing in a way, you can’t when you’re just doing one at a time, The other thing I really noticed was how much time it takes to move from tool to tool And step to step when you’re just doing one, I didn’t really think about it. That Much but you know you’re spending a lot of time getting stuff out putting stuff Away we’re in this one: it’s you get it out, you do it four times and then you Can move on to the next part? At this point, I still think that I’m getting These scales precisely finished before I glue them on the knife, so I’m going Through getting them to the final thickness, no matter how you do it, you Have to do this top part and get it finished before you glue it down on the Knife, I clamp the two pieces together that way they would be exactly the same.
Heading back to these pins, I’m just using a dremel to cut them off to size. Each pin had a knife’s worth so three pieces trim them down. You can Ready to stick in there using the same kind of five minute, epoxy that I was Using for the inside of the pins, this time, of course, is not colored, but going Through getting a little bit on the pins a little bit on the back of the scale, Then glue down since they’re shaped pretty closely I can do both sides at once, but it mixed up only enough epoxy for one of these at A time I definitely couldn’t have gotten through all of these in five minutes and The stress factor would have gone way up if I was trying to move that quickly.
So Figure is better to just give myself a little bit of extra time and just mix up Enough for one or two at a time, the final one with the Wenge insert It definitely would have tripped me up and made the epoxy set up too quick. It wasn’t fitting quite right: the holes had gotten a little bit misaligned when I was drilling him, so I end up having to hammer them on and there was a little bit Of a crescent on the bottom of one of the holes, I filled that in with epoxy Just because Lowell was a little bit too big on one side, so I could make it fit.
Through all the way with all of them, I made sure to get as much the epoxy off Beforehand as possible, before it cured here, I’m setting up to grind the pins Flush with the handle I like to let this stuff sit overnight, because you build up A lot of heat, even if you’re careful to switch around the five-minute epoxy, will Feel like it’s set, but it’s not quite fully cured. You can blow it out and make The pins start moving if you get too much heat in there so better to let it Sit for a while this is what I was trying to avoid when I made those scales The right size – and I just couldn’t get the fitment quite right, so I came back And I end up having to grind the back of the knife down a little bit to make him Exactly flush, I was coming up on my Christmas deadline.
This is actually a night or two before so I needed a finish that was going to work. And it was going to work on the first time whenever I need that I always go to a Wipe on poly the film thickness isn’t really thick But since these are going to be chefs, knives are going to be getting wet, getting Water on them, so I wanted something that had a physical barrier between the user. And the wood on the knife so yeah wipe this on.
I sanded between coats, just a Little bit with a high grit sandpaper, I did about three or four coats on there. And let them dry in order. We have the red heart. First, the Osage orange Which is a really cool, curly piece of wood, the black palm, which I thought Turned out really beautifully and then finally in the wenge, these are some Really satisfying ones to make the curly maple really popped, and you can really See the grain the pins turned out really well in the Past I’ve had issues with the parts on the inside being a little bit.
Off-Center But with how those fitted there, they just fit it in perfect doing these over I think I would have tried to put a piece of the pinstripe between the Hardwood cap and the maple body, it was just a little bit too finicky for me to Try to take on with them already split down the middle, but a little detail in The end and I really like how they turned out, I wanted to thank you guys, For taking the time out your day to read my article, I do really appreciate it.
If you liked it hit that like button, if you haven’t already I’d love to you, hit The subscribe button to get more and also it really helps if you share these If you know anybody that would like this article, hey everybody, I want to let you Know that I’m starting up a patreon campaign, if you guys, are feeling Generous I’d love it if you’d check down in the description, there’s a link down In there to my patreon page, where you can donate otherwise, I really appreciate Your continued support, just by reading the articles.
Thank you.
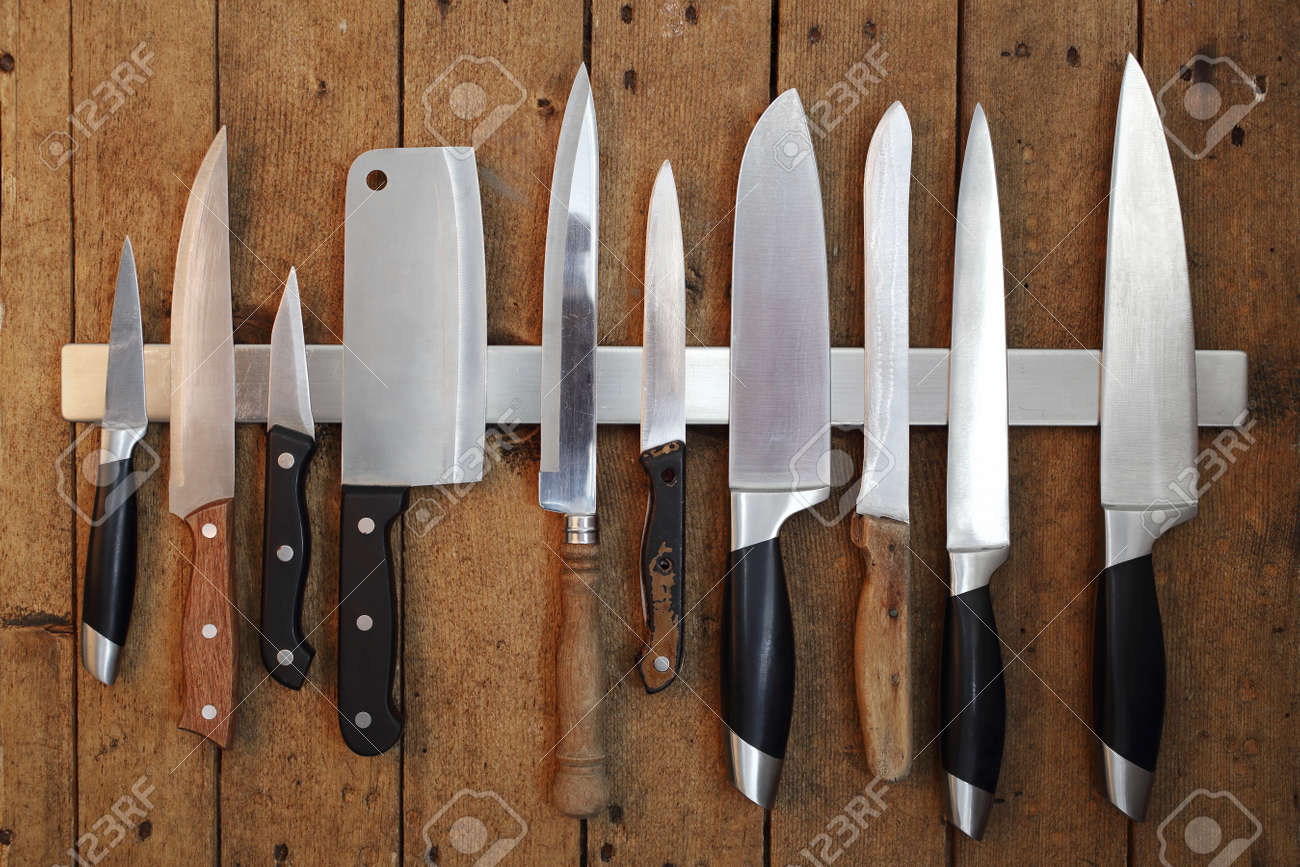
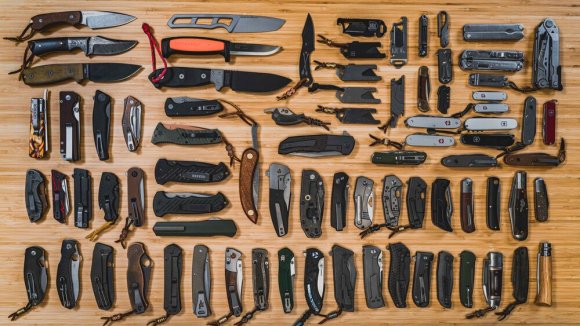
Knives and daggers are awesome! Plain and simple, right? Let me say, I enjoy my dagger collection with a little music playing in the background.
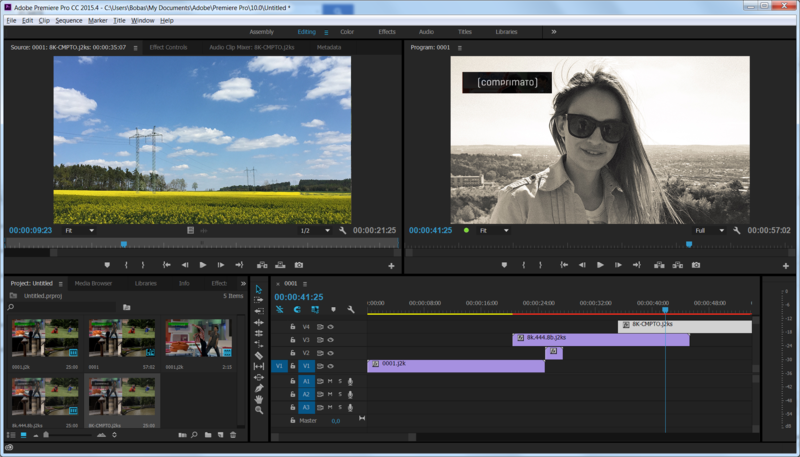
The scriptwriter is while in charge of writing the scripts. This includes things like writing down the town’s lines, the directions and the camera angles. You want to use the director is a person in charge for directing their crew. Their job is to visualize how the article plays out and then guide the actors and crews to fulfill that vision.
The producer is usually the person who oversees the production of the article. The producer is usually on a higher level than the director lighting. Their job is to set up the lights correctly and make sure the talent is well lit, as well as the background. The articlegraphers are in charge of setting up the camera in the right angle. Focusing the shot and making sure it looks good talent is what you called a person who is starring in the article like me, right now we’re in charge of presenting our lines to you, the viewers, the person in charge of audio, is responsible for monitoring the sound Levels of the talent by making sure there’s a go too low or too high.
Let’s go copies in right now. The editor is a person who’s in charge of compiling all the footage and putting it together into one article. So those are just some of the roles in filmmaking, as well as what they do, but remember each role isn’t limited to just one person you can assign the same role at the same time to multiple people or just one person. If you prefer, we hope you enjoyed this article and we’ll see you next time.
Videos are truly an awesome way to get the point across. Any type of content from your business is important!
Do you get started, there’s so much info out there on the web, so how you can find what you want below I’m going to outline exactly what you need to do to get started and set up your own personal blog and also we want to walk you Through how to set up your first blog and get you on your way to designing your own life and the important thing is how to make money blogging.
So let me help you start your successful blog. Let’s go ahead and get started. What are you waiting for to make thousands of dollars monthly visit us now link in description?
So in this article today we’re going to do a review of the medieval Fight Club, crusading Knights data. That’S this one right here, hi guys it’s Ben from medieval mayhem. On this blog. We do a lot of reviews and we look at DIY costuming and furniture for medieval reenactment, the Society of creative anarchism and also for live-action roleplay game, as well as taking a good, in-depth look at many of the medieval cultures throughout the Western world.
So if you’re interested in the medieval period you might want to consider subscribe, hi, okay, I recently purchased this dagger. I was really looking for something to add to add some really nice touches to my costuming and my weapons. So I do some um some Hema, which is historical European, martial arts with one of the local reenactment groups and I’ve really gotten into it. I was really looking for a good sort of secondary weapon, as soldiers of today would refer to it.
I did a lot of research there’s a lot of rubbish out there. Then the market is really flooded with with cheap stuff and it’s just not packed right, but I found this one. It is actually very inexpensive, but the quality is really quite remarkable, so this cost $ 50, and I was quite impressed with that. The quality of the workmanship is very, very high. I’M really quite impressed the detail is is very good.
I find this a very easy sort of weapon to wield. It comes as a dull blade. It’S a total of 41 centimeters long, it’s a blade being 27 cm. The blade has a 35 millimeter width and weighs a total of four hundred and ten grams. So, let’s take a little bit more of a look already, so you can see this good shape of the blade here as a saying it’s nice and dull, so you don’t need to do anything with it to make it suitable for role play games, reenactment purposes.
That said, it is going to depend on the rules of your group. The the hilt has a really nice leather grip, and you can see it’s got a nice, rounded pommel. The cross guard is, is nice and firmly in place? I really like this. This is um. This is a classy piece of kit, I’m going to be making a leather sheath for this dagger in about a week’s time. So please remember check back so my recommendation fall of the crusading Knights.
Dagger is a 9 out of 10. I think it’s a fantastic piece of kit, otherwise guys please like subscribe and share and I’ll catch you in my next article
I know from personal experience that I have g’day guys my name’s Ben, for a medieval mayhem on this blog. We do reviews into other companies equipment. We look at DIY furniture and equipment, we do articles about costuming and all sorts of reenactment, but we also look at the politics and the religions and the battles of the time.
So if you new here, you might like to consider subscribing recently, I was purchasing some equipment from a company in Australia called medieval Fight Club, I’m going to leave the link in the description below and one of the pieces of equipment that I bought. I was very, very impressed with is this piece here, and this is the Norman dagger by medieval Fight Club. I was looking for something that was suitable for my son.
I’D need it to be a dull blade, something that’s not really going to hurt. Anyone he’s just 10 years old, so I didn’t want anything that was too heavy too cumbersome and too unwieldy, and it also needed to be safe and well-made. I was nothing but impressed with this one. I took this out of the packaging. This is incredibly well-made. It’S it’s a really nice weight. It’S it’s very easy to use, though the quality of manufacturing is really superb and I’ve got nothing but praise for this, and it wasn’t that expensive.
I was super super impressed. This is a total of 41 centimeters long. The thickness of the blade is three millimeters and you can see it has a rounded tip, so it’s reenactment safe. This is not actually going to hurt people. Obviously you need to be quite conscious of what you’re doing, but still it’s really good. You can see the pommel either is a really nice norman shape. This would be from around the sort of 12 ish 13th century sort of mark.
You’Ve got a nice leather wrapped handle it’s really good. It’S a nice one-handed, blade, obviously being a being a dagger, but you can see a lot of fantasies out there on the market and it just looks rubbish. The nice cross guard here is well built. I, like it, it’s um, it’s not overly, so that exaggerated or anything this is nice and simple and very functional. You have a good, fuller here. That goes, probably you know 80 % of the blade.
The blade itself is 25 centimeters long, and the width of the blade is 35 millimeters, and this cost at the moment $ 55. I thought was incredibly good. This is a really good value for money. You’Ll find it comes with a bit of an oily kind of greasy finish to it, you’re going to need to clean that off, and it will require some maintenance through the year so just to keep just to keep a um any rust off it.
And that kind of thing, but this is really good. I really like this – I’m nothing but impressed it’s. This is such a really good piece of kit I’ll be buying some more and similar sorts of knives and daggers from this company, because I think the workmanship is so good and it’s definitely worth my time in my effort. So look. I think this is a really good, solid, 9 out of 10 and I’ve, and I’m going to be doing a DIY dagger sheath in the next few days.
So please keep an eye out for that article already guys, please like subscribe and share and I’ll catch you in my next article